I can't claim the original idea for this block, that stroke of genius goes to Corey from Little Miss Shabby, but I can share my method for making this sort of block. Once you get the hang of it, it's really quite quick & easy to put together, not to mention addicting!
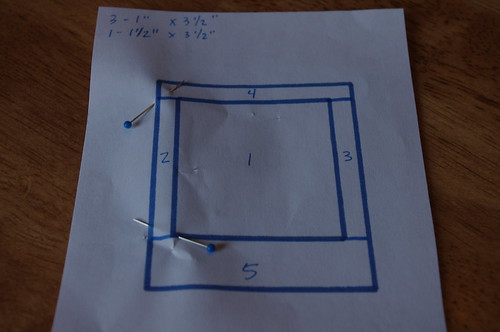
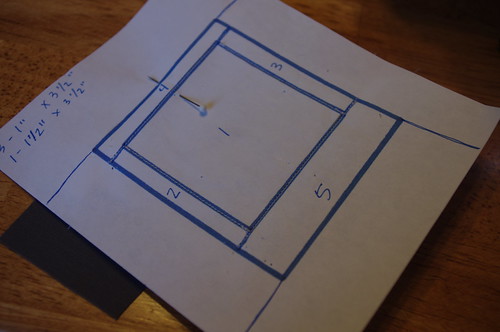
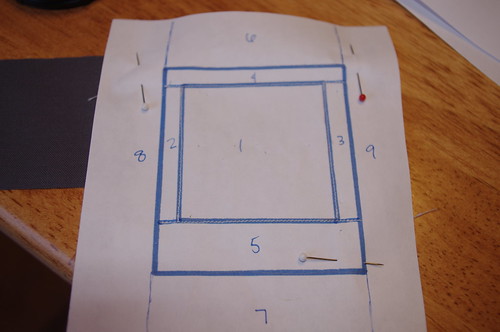
First of all, if you want accurate & consistent ¼" white borders around the center picture, I recommend using paper piecing. I've put together this template if you'd like to use it. It includes four templates, I just cut them into individual pieces & work on each separately. The background isn't marked since you can make it any size you would like.
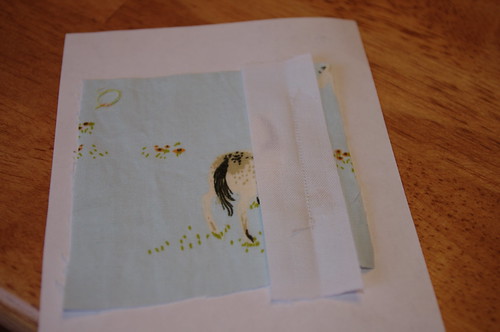
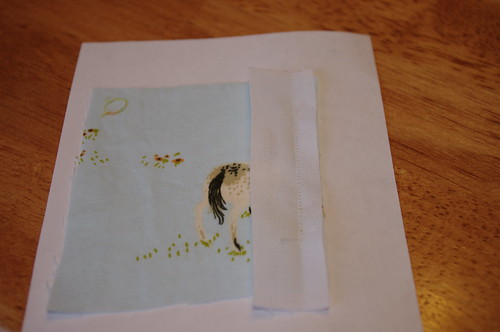
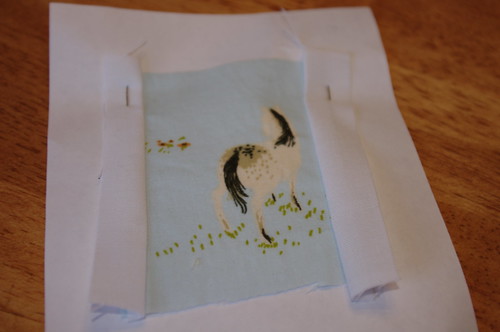
For each Polaroid, you'll need one 2 ½" x 2 ½" picture, three 1" x 3 ½" white strips, & one 1 ½" x 3 ½" white strip, plus your background fabric.
So start out with one square from your template. If you've never paper pieced before, we're going to be doing a very easy version of it here. This block could easily be done without paper piecing, but I prefer it to get a consistent border around the picture.

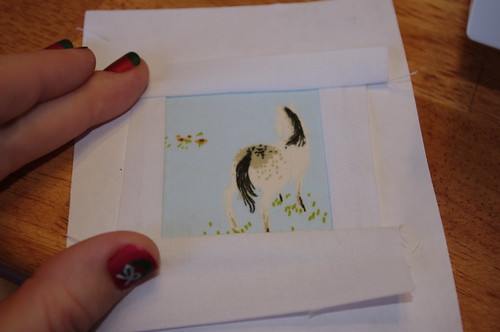
The first thing you want to find is your center "picture" portion of the block. You will end up with a 2" x 2" square visible. I've cut a little template out of a scrap piece of paper. The "window" is 2" x 2" & the whole square is 2 ½" x 2 ½". This way I can see what will show & since I'm using a lot of scrap pieces, I can easily tell if they are big enough.
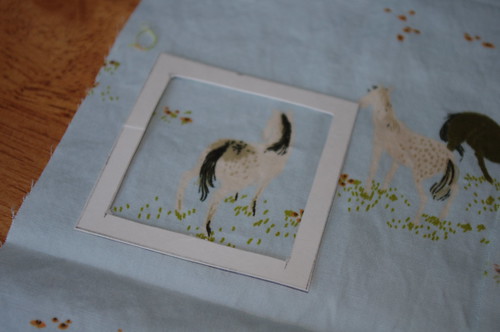
You can also easily play around with the placement of the part that will show before cutting anything. Then just use it as a cutting guide to cut your 2 ½" square.
Next you want to line up your square on the back side of your sewing template in area 1. So one side of your template should have your lines that you'll sew on, the other side will have your fabric right side up. I like to hold my fabric & template up to the window or a light to make sure it's centered & I have enough overlap for my seam allowances.

You can see I've cut this square bigger than 2 ½", which is fine. You just don't want to go smaller.
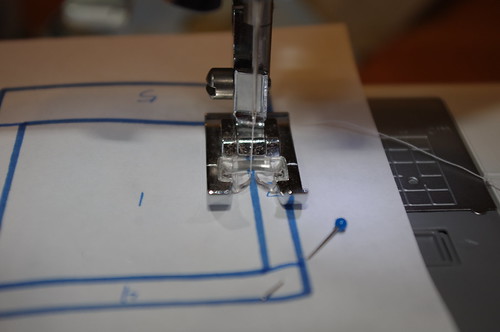
Now lay your first 1" white strip on the fabric side of your template in area 2. You'll be sewing on the line between 1 & 2, so again hold it up to the light to make sure you have it positioned correctly.

If your fabric had a right & wrong side, you would want it & your center block right sides together, but since this white has no right or wrong side, it's much easier.
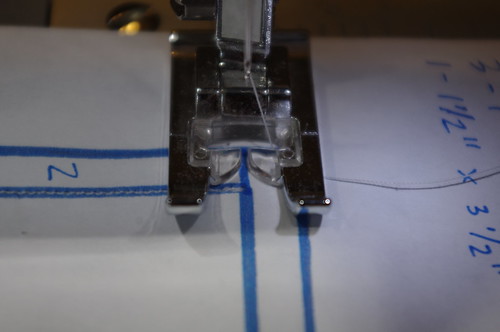
Flip your block over to the printed side & make sure you have everything pinned in place so it doesn't shift while you are sewing it.
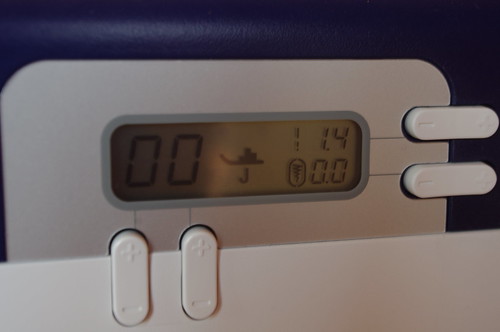
Make sure to turn your stitch length way down, it will better perforate your paper which will help make it easier to tear off later. If you forget (I have a time or two!), it's not the end of the world, but your paper will be harder to remove without pulling on your stitches too much. My normal stitch length is 2.5, so I go down to 1.4.
Like I said before, you'll be sewing that line between areas 1 & 2. I do like to backstitch a couple stitches at the beginning & end of each line.
Turn it over & make sure your fabrics didn't shift or fold & get caught in the stitching (happens to me all the time!). Then trim the allowance down to about ¼". It doesn't have to be exact.
Before trimming
After trimming
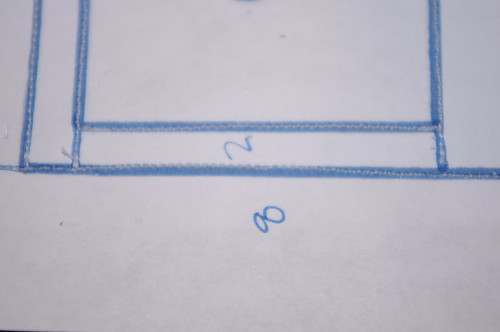
Next we will do the same process for the 1" white strip in area 3. Unlike most paper piecing patterns where you would sew a line between 2 & 3, they don't touch on this template, so sew on the line between 1 & 3.
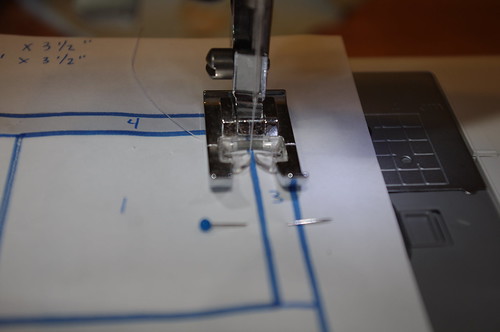
Finger press both seams, then pin (from the printed side) in place to make sure they don't shift while you sew on piece 4.
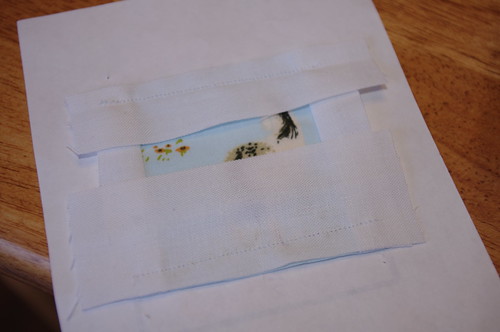
Piece 4 is the last 1" strip, sewn along the top where 4 meets 2, 1, & 3.
Once again, finger press 2 & 3, then pin in place where they meet piece 5 (1 ½" white strip).
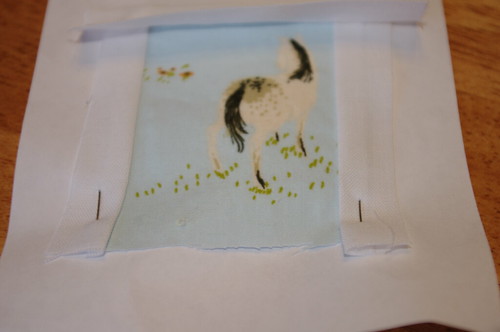
This time you'll be sewing along the bottom, where 5 meets 2, 1, & 3.

Make sure you're still trimming your seam allowances.
Finger press pieces 4 & 5. Sorry this is difficult to see, white fabric on white paper doesn't photograph well!
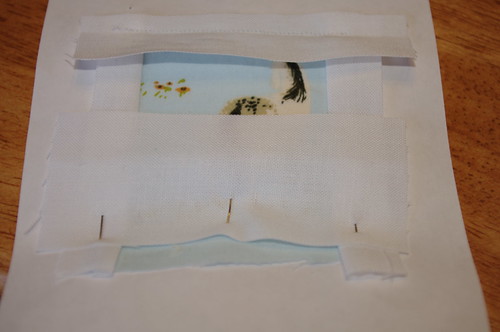
Now you'll start adding your background pieces. You can easily do this the same way you would do a log cabin, or any border of your choice, but I recommend still using the template since you want to keep that nice ¼" white border. Draw your lines directly onto the template for the background pieces.
Then number them if you need. I originally numbered these backwards (oops!), so ignore those crossed out numbers.
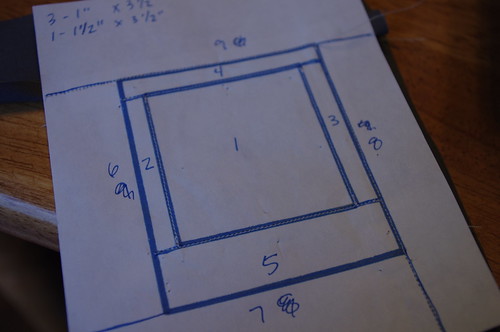
Here's a better (and easier) arrangement that works the top & bottom first, then left & right.
Sew along each line to add your background pieces, finger pressing & pinning overlapping seams as you go. If you don't finger press and/or pin your pieces as you go, they can easily get tucked in a bit & mess up your white border.
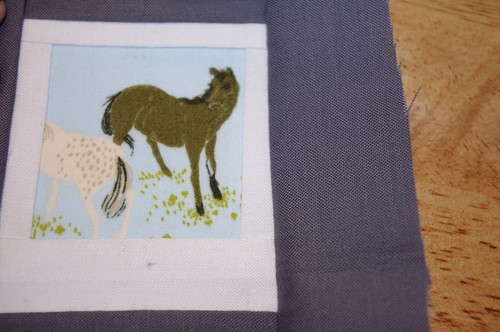
Here it is with the full border. I didn't bother trimming it, since I would trim it after adding it to the other blocks. I also didn't worry about making sure my border pieces are the same size since I want my blocks to have varied borders, but you could make them all the same size if you prefer.

If you look close, you can see on the lower left of the Polaroid where my grey got tucked in just a bit because I didn't pin it in place, so my white isn't a perfectly straight line. This time wasn't terrible, but do be careful!
Another thing to watch out for is where you sew on the lines. Try to be consistent, whether you sew down the middle of the line, or on one side or the other doesn't really matter as long as you're consistent. Here you can see I veered from one side clear to the other between areas 2 & 8.
On some paper piecing projects this won't make much of a difference, but with only ¼" of the white showing, it's pretty obvious. See how it flares out at the bottom here?
In the grand scheme of things, it shouldn't be too obvious mixed in on an entire quilt, but it's definitely something to look out for!
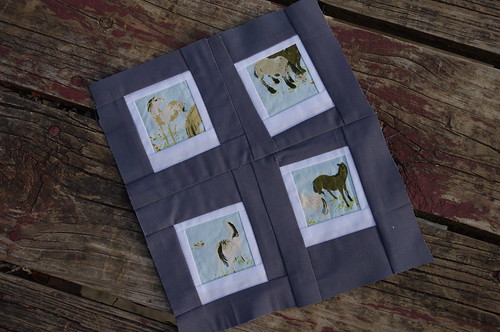
Once you've got multiple photo blocks put together, it's time to sew them together into bigger blocks.
Have fun with the arrangement of your pictures. You could group similar ones together like I did here, or go totally random & scrappy. Maybe you could use the pictures to tell a story. It's also a fun alternative way of making an I-spy quilt.
I've created a Flickr group for any projects you've made from my tutorials, so I'd love to see the blocks you make!
Until next time...