Showing posts with label purse. Show all posts

Tuesday, June 28, 2011

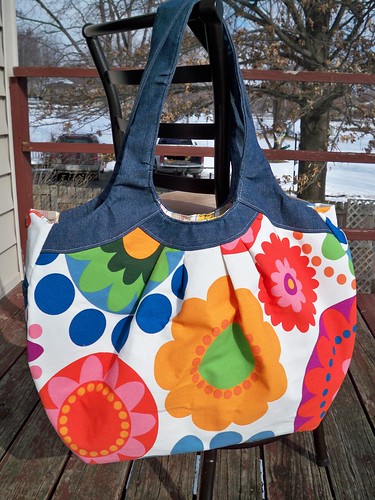
Teardrop Bag: Completed!

I had hoped to share this the end of last week, but Mr. Sun has been less than cooperative for me to be able to get decent pictures. Well, not cooperative on my schedule, at least! The nerve...

First let's have a little reminder of what the Teardrop Bag is supposed to look like, since I went a little in my own direction. Anybody surprised?! :)

IMGP0114

I chose to make the small version, and I'll be the first to admit I'm a terrible judge of size when looking at finished dimensions on bags & such. And honestly, I'm not even certain I looked closely at the finished dimension before I got started. I knew what fabric I had on hand that I wanted to use (remember, I'm trying to sew all projects from my stash), and I knew I didn't have enough for the large bag. Don't get me wrong, I'm happy with how it turned out, and it's really a perfect size if you want a nice, small bag to throw a few things into & run out the door. But for me, it's definitely not big enough (and doesn't have nearly enough pockets!) to be an everyday purse. Good thing I didn't make it with keeping it in mind.

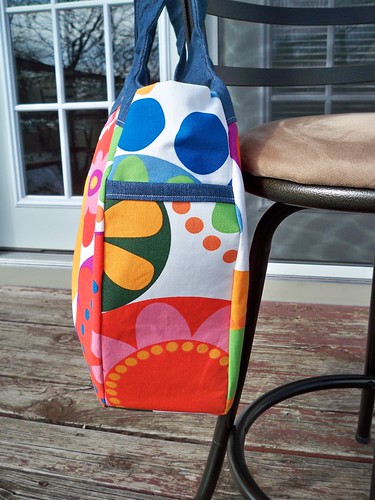
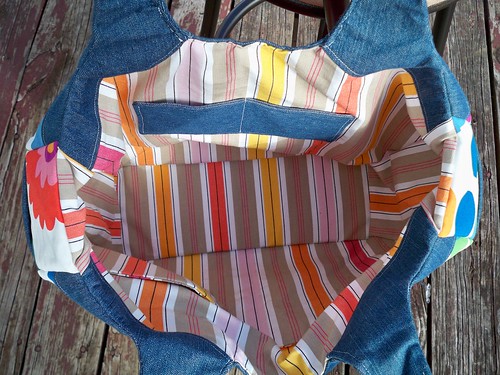
I mentioned before (and had issues!) that I chose to put the pocket on the outside, rather than inside, of my bag. Because of the size, it would have been more of a divider on the inside than a pocket, so I figured it would be more useful on the outside.
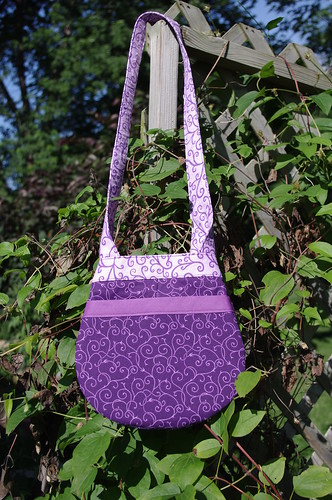
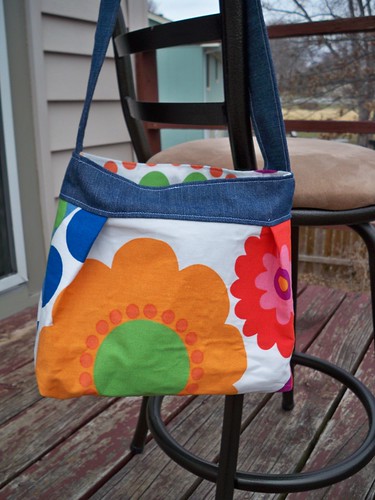
Teardrop Bag

I just used pre-made bias tape to edge the top of the pocket to add a little extra contrast. I toyed around with the idea of doing it like the side pockets on the Cosmo Bag, but in the end stuck with the bias tape.

Because of the width of the pocket piece, I couldn't really figure out how best to do the pleat so that the finished width was the same size as the pocket. I'm still not sure how those of you who did the pleats correctly did it, but I'm okay with how mine turned out. The pleat kind of "opens up" to add more space.
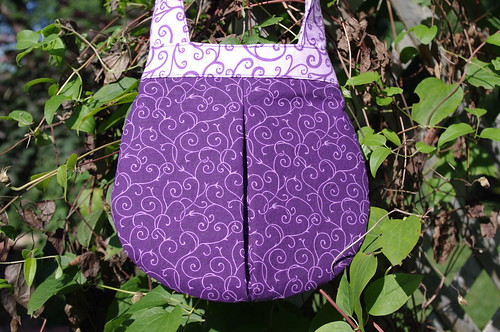
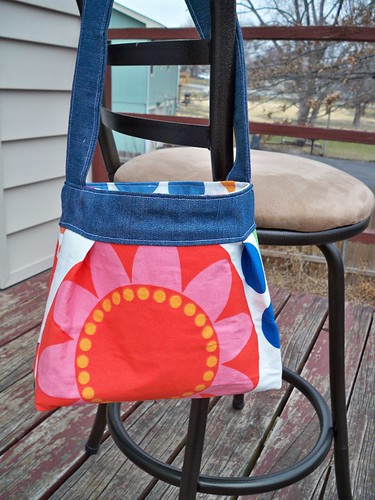
Teardrop Bag

The opening of my bag ended up really small, and there was absolutely no way I was getting it in the machine to add the side hips. It's a cute detail, but thankfully I don't really miss them. I don't think they would have interfered with the exterior pocket, if I remember correctly when I was trying to add them, they cam just to the top edge of the pocket.
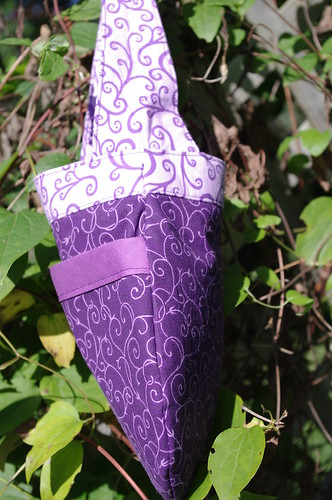
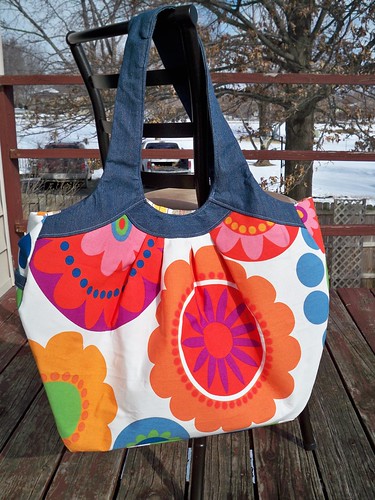
Teardrop bag

Overall, I think the pattern was a good one. I think this size would be perfect if you wanted to make one for a little girl who loves purses, although you'd probably want to adjust the strap length in that case. I didn't get any pictures of myself holding this purse, but it does fall pretty much the same as it shows in the book photo.

And you know I can't go without saying - I still think this bag was easier than the Cosmo. ;)

Until next time...

Thursday, June 16, 2011

Old School Modified Mabel

Time to reveal the secret project! I hope it's all it's cracked up to be after I've been talking about it for a couple weeks. ;)

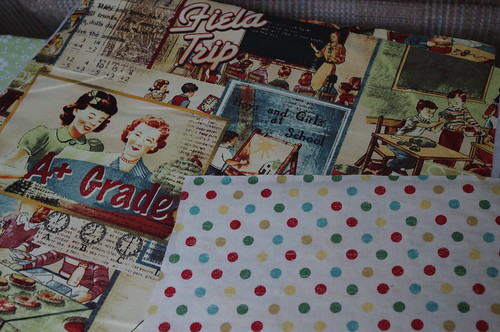
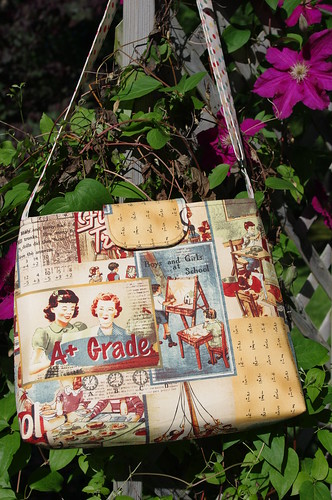
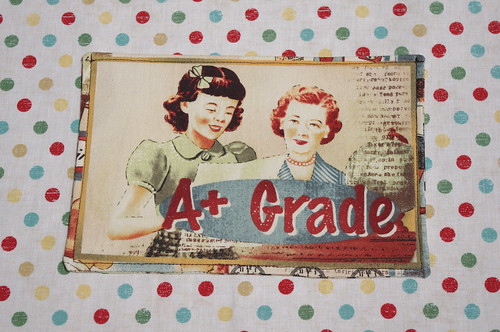
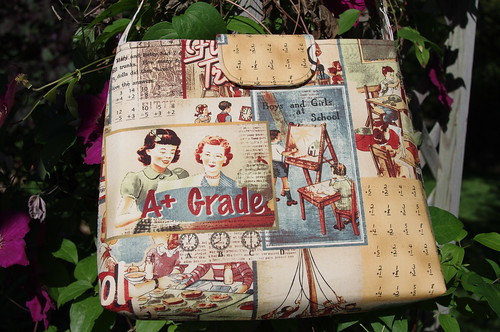
I picked up this fun retro school print & matching polka dots at my local quilt shop. I wasn't super crazy about them in the beginning, but the bag was for someone who worked in a school, so I thought it was a good fit. Now that it's all said & done, I couldn't be happier with the fabrics I chose!

IMGP0194

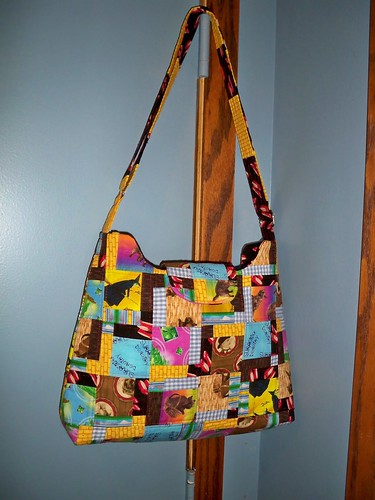
I used the same pattern as I did for the Wizard of Oz bag back in December, the Mabel Bag from Jenna Lou Designs, but modified it just a bit. Yes, I know that I said back then I would never make this bag again. I absolutely love the finished bag as written, but it was such a pain to make! I realized after making it the second time that I certainly made it a lot harder on myself the first time by using the patchwork. I love the finished look of the patchwork, but it was so much more time-consuming to have to make my "yardage" before even starting on the bag.

Mabel bag

The only change I made to the pattern was to straighten out the top, getting rid of that curved part. I love the look of it, but the Peltex makes it so stiff that it's really hard to maneuver around my sewing machine. Getting it sewn together at the top the first time was really difficult, but not impossible since all the misses on the curve are hidden inside. Unfortunately, there was no way to top stitch it & have it look nice on the outside, something that really bothers me not to be able to do. Straightening out the top of the bag made it much easier to put together & I was able to top stitch once it was all put together, so I was much happier with the newer version.

Modified Mabel bag

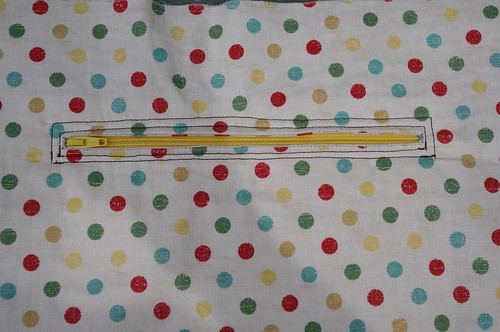
I did add the zippered pocket to this version. I didn't on the WOZ bag since I only had enough fabric left for the lining & didn't have any extra in case I screwed up. This was my first try at a zippered pocket, and while it didn't turn out perfect, it at least worked.

IMGP0196

I'm not crazy about the double border on it, and wish I had used lighter thread so it didn't stand out so much since it doesn't look so pretty. But like I said, it's functional, and that's what matters!

I didn't use the instructions for the zippered pocket that came as part of the pattern because I just couldn't figure out what I was supposed to do. Instead, I used instructions for a zippered pocket that came in the Sweetheart Shopper pattern from Keyka Lou. After the fact (of course!) I found out that The Bag Making Bible includes instructions for doing zippered pockets. I did look at the book when I was trying to find good instructions, but silly me, I looked in the Pocket section. Turns out the instructions are in the Lining section, and they look like a piece of cake, so I'll be trying that method next time.

I also added a simple slip pocket to the inside because I couldn't resist some fun fussy cutting for the pocket.

IMGP0200

The front & back of the bag are each a little bit different.

Front
Modified Mabel bag

Back
Modified Mabel bag

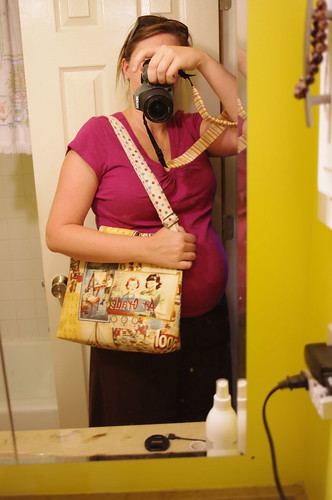
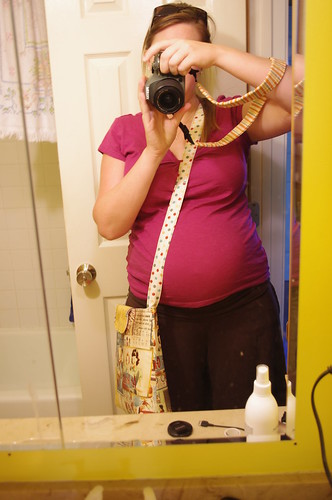
I made an adjustable strap (using this hardware, also from Jenna Lou Designs) so it can be carried over the shoulder or across the body. I can't remember exactly, but I think my strap was about 56", so it's plenty long, even when extended all the way.

Modified Mabel bag

Modified Mabel bag

All in all, I'm really happy with how this turned out, and even happier since the recipient loved it! And since it was so much easier this time around, I'm already planning another one for myself.

Until next time...

Thursday, February 24, 2011

Reversible Everyday Shopper: Completed!

I was less of a slacker this month & have had this bag completed for a couple weeks now. It felt so much better than scrambling the last weekend to get it finished up! It's amazing how much more time I seem to have now that we're not still recovering from the holidays. Of course, it sure doesn't hurt that this bag was just a smidge (okay, okay, a TON) easier than the Cosmo Bag.

From what I've seen so far from those of you who have completed it, I think you'd have to agree with me that this should have been the first pattern in the book. I guess I must have assumed that not only did I expect the book to advance through the sewing levels (easy, intermediate, advanced, & experienced) in order, but I also assumed the patterns within those levels would be in order of difficulty. Boy was I wrong!

I enjoyed making this bag, it was a nice break after working so hard on the Cosmo Bag. Cutting out the pieces & interfacing didn't take me two days, and sewing would have only taken me an afternoon if I'd had the time do work on it in one sitting.

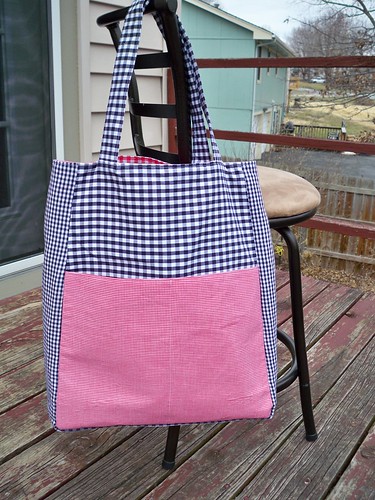
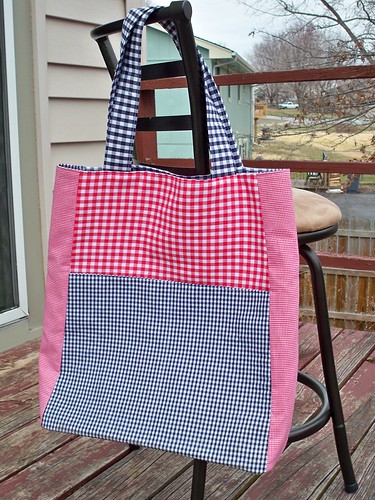
As I mentioned before, I chose to use four different fabrics for my bag - all red & navy gingham, in three different pattern sizes.

Reversible Everyday Shopper fabric

Let me tell you, sewing with tiny gingham is a chore & hard on the eyes! I was pretty much cross-eyed by the time I was done, and even now it kind of hurts to look at it! I do like the final look of the bag, but I don't think I'll work with that small of a gingham pattern again.

My finished bag reminds me of summer picnics, and a blanket we always brought to sit on while watching fireworks for the fourth of July.

100_1061

Reversible Everyday Shopper

I think I like the red side with the blue pocket the best, mostly because the blue handles add some extra contrast. I also like the way the smallest & largest ginghams look next to each other when they're the same color, rather than the largest & medium on the blue side. Again, it adds extra contrast.

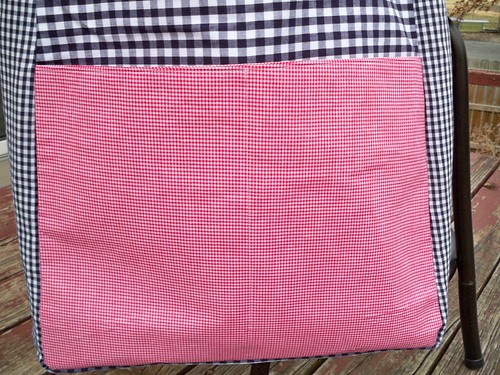
I did split my pockets in half, although mine doesn't look as cute as Chrissy's. It's difficult to see here, but I just did a plain line of stitching up the center of the pocket. Try not to hurt your eyes looking too close! :)

Reversible Everyday Shopper - pocket

I really didn't make many changes to the pattern when I was working on this one. I used a fairly lightweight interfacing so it would be easier to turn inside out, and used a lightweight cotton instead of home dec fabric. I also chose not to fold in the straps since I did use decor bond interfacing on them, and I liked them better laying flat. Like I mentioned earlier, I did split my pockets in half. They just gapped too much for me. I haven't done it yet, but I plan on doing at least a few stitches in the seams to attach the two layers together so it'll be easier to turn inside out.

Remember you can check out another pattern review from Sara at Sew Sweetness, and there's a ton of great inspiration in the Flickr Group. I'll have a linky party on Monday for you to share your completed bags for your chance to win this month's giveaway - a half yard each of FreeSpirit Olive Rose by Valori Wells, in emerald & pink.

Olive Rose Emerald

Olive Rose Pink

Get sewing this weekend (if you haven't already!) and I can't wait to see what every has to share next week!

Until next time...

Saturday, February 19, 2011

Heidi Bag from Vibrant Designs

Remember the "top secret" project I mentioned earlier this week? Well, it really wasn't too much of a secret, I just wasn't sure if I could blog about it yet. I was lucky enough to be chosen as a pattern tester by Julie of Vibrant Designs for her new Heidi Bag pattern.

This is a really cute little bag (9 1/2" wide x 9" high x 4" bottom), that goes together super quick & easy. I really like the nice, wide bottom (and it's a boxed bottom, my favorite kind to make! No extra pieces or darts!) that makes this bag really roomy for it's otherwise smaller size.

Heidi Bag

Like I mentioned before, I went ahead & used the same fabric I used for my Cosmo Bag, I just can't get over the combo. I ended up not using the striped fabric for the inside this time, instead did some fussy cutting to get different colors on the inside.

Heidi Bag

The exterior, pocket, & strap pieces are all just rectangle cuts, and the interior pattern piece is made by tracing the exterior after sewing on the top band. I traced mine onto freezer paper so I only have to do it once, but you could save a step by tracing it directly onto your fabric (as the patterns calls for). I think I'm going to trim my piece down by just a smidge though, it was a bit baggy on the inside.

Heidi Bag - Interior

There are two slip pockets on the inside, one wider one that is split in half. Next time I will make the narrower pocket just a bit wider, my phone only barely fits.

Heidi Bag pockets

Overall, I really love this bag & will definitely be making it again!

Head over to Vibrant Designs to see the Heidi Bags the other pattern testers have made.

Monday, January 31, 2011

Cosmo Bag: Completed!

Cosmo Bag Exterior

Ahhhh...satisfaction! I was so glad to get this bad boy finished up this weekend, and just about as excited to actually have some sunshine to take a few decent pictures! :)

Let me tell you, this pattern was certainly a test of my patience, and from the comments I'm seeing from those of you who have already completed the bag, I'm sure you'll agree! I'm just hoping the rest of the "easy" patterns in the book are less complicated than this, and I'm now just a little concerned about the later "intermediate," "advanced," and even more so the "experienced" patterns!

I do know from looking through the Flickr album, everybody seems to have successfully conquered the pattern, and there are a ton of really beautiful bags. I love how even with the exact same pattern, we've all created so many different looks, just with our fabric choices.

So, my overall thoughts:

First of all, I mentioned clear back in the beginning that this bag would be perfect for large prints, and I'm glad so many did choose the big prints. Here's the other side of my bag, I purposely chose not to have my two sides match exactly.

Cosmo Bag Exterior

Some people mentioned that the side pockets might be a bit pointless since they're so tall & skinny. I can certainly see where they're not going to be for everybody. I happen to have a tall, skinny water bottle that fits perfectly, so it works for me. Some people modified it by just making the overall pocket shorter, and I saw someone else (sorry, I can't find the picture now!) who just stitched across the pocket half way down. I also like this version with two pockets on the side. I think a shorter pocket would definitely be nice for keeping keys & a cell phone a little more handy.

You can't see it in the pictures, but I chose not to make the handles out of two separate pieces. Instead, I cut the handle pattern with the top of the strap on the fold, and only had to cut out four pieces. I wasn't fond of the idea of having a seam in my handle (and therefore a weak spot) and honestly didn't really see a reason for it. My handles worked out fine, I had one less seam to try to topstitch over, and I love the look of the one-piece handles.

The pattern didn't call for any top stitching on the contrasting band of the side pocket (which came up in the Flickr discussion), but I went ahead & added it. It helped hold the two layers of the pocket together at the top, and I thought it would look nice to match the top stitching on the bands & handles.

Cosmo Bag Side

The interior pockets are huge, and I wanted some smaller pockets to keep track of smaller stuff. I had mentioned before that I was planning to do all the large pockets as called for in the pattern & add a couple small ones, but instead I opted for the large pockets on one side only, and added a smaller patch pocket on the other side.

Cosmo Bag Interior

I did add two pieces of craft foam board into the bottom of the bag to help give it extra strength. I just cut two pieces slightly smaller than the bottom panel (they ended up being 5" x 14") & put them in before I stitched up the inside of the handles. Then, to keep it in place, I stitched the lining to the bag along the seams (unfortunately, after the above picture was taken). I did this for the first time with the WOZ bag, and really like how much better everything stayed in place after the lining was stitched in. No more shifting lining, and on such a big bag, it helps a ton. It's not overly hard to do, just a bit time-consuming.

You'll probably notice I didn't add the button & loop closure. Honestly, it's partly because I just didn't feel like it. I had decided early on that I didn't want to add it (even though I think it's a cute feature), and considered adding a magnetic snap instead. Then, in the end, I decided it wasn't flopping open too much, and if it were stuffed full, I probably wouldn't be trying to secure it close anyways since it'll most likely be used as an overnight or beach bag.

Overall, I'm really happy with how the bag turned out, despite some of the frustrations in the construction. I'm not sure it'll go on my to-do list to make again anytime soon, but that's more because I don't really have a need for such large bags. I do think it's a decent pattern to have in my collection though, in case someone should request a large bag.

I'm excited to start working on the Reversible Everyday Shopper for February, it looks like it will be much easier!

Until next time...

Monday, January 3, 2011

Wizard of Oz Mabel Bag

Here's the one big project I worked on for Christmas, and have been anxiously waiting to share, especially for Amy's Sew & Tell now that it's back from "Christmas break." I've also been kind of slacking since I actually gave this away on Christmas, and haven't gotten around to sharing it with you all before now.

This pattern is the Mabel bag from Jenna Lou Designs. I love this pattern! It's a great size for a messenger bag, and could easily be used as a laptop bag with some padding or a padded laptop sleeve. It uses Peltex interfacing, so it's nice & sturdy.


I did a disappearing nine patch for the main outer fabric made from 12 different Wizard of Oz fabrics I found at a local quilt shop.


My favorite of the prints is this "Surrender Dorothy." Also, it's difficult to see, but I did the "quilting" (not exactly, since there's no batting) with metallic red stitching.


The pattern calls for a zipper pocket on the inside, but because I only had just enough fabric left and hadn't ever tackled it before, I decided to play it safe with a simple slip pocket. I did add a strap with a clip for keys, or this little pouch.


The pouch is made from the Keyka Lou keychain clutch pattern, but I increased the pattern size 115%. It's now big enough to hold an ipod touch (or iphone). The original pattern size is nice & small, but wouldn't hold anything but a small phone or some change.


The strap is adjustable with metal hardware, and is made from alternating size pieces of the yellow bring road & ruby red slipper fabrics.

Overall, I couldn't be happier with how this turned out. It was relatively simple to make, and if I hadn't decided to do the patchwork, it could have easily been made in a weekend instead of over about a month's time. One thing that was difficult though was the Peltex lining made it a bit clunky to maneuver, especially around the curve in the top. Also, because it's so thick, I had to hand-sew the strap reinforcement & wasn't able to topstitch around the opening, which I usually prefer. It doesn't look terrible without the top stitching, but it's a finishing touch I always like to add.

Until next time...


Sumo Sweet Stuff Pink Hippo Party

Tuesday, November 30, 2010

Sew & Tell: More Keyka Lou City Totes


I found Sew & Tell over at Amylouwho (she's the one with the awesome bunting quilt block!) a few weeks ago now, but haven't been able to get anything finished up to share. And when she announced last week that Sew & Tell will be taking a holiday break, I was bummed because I wouldn't be able to share anything until after the first of the year. Of course, the majority of my projects right now are gift-related & can't be shared anyways, but I was bummed all the same.

I've had pieces cut out for this new City Tote for a couple weeks now, but haven't been able to find much time to sew, so I was pretty happy to get some work done on it when we got home from our Thanksgiving trip Sunday night. I was even happier when I was able to get it finished up!

It's hard to get decent pictures when I'm never home in daylight hours during the week, so please excuse the picture quality. :)


The outside of this one is made with corduroy & is super soft. I absolutely love it.


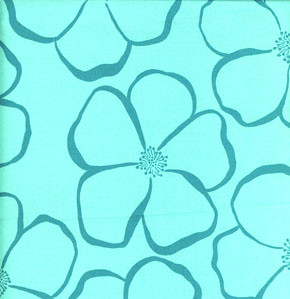
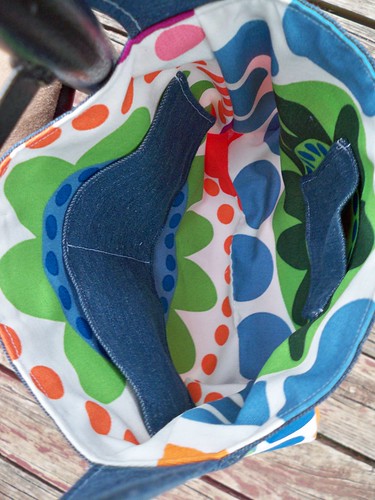
I didn't want to use the cord on the inside, so I used this fun fabric instead. I know it's not exactly matchy-matchy, but it looks pretty darn cute. The flower shape are similar to those on the outside & the blues match, so it pulls it together pretty well. I also use this fabric on the underside of the strap (you can kind of see it in the top picture) so it doesn't hang all wonky when carried.


Here's a better shot of all three fabrics. I promise the browns match better than what it looks like here.


And here's another City Tote that's been done for a couple weeks, but I wanted to share quick as well.


My friend is a huge Kansas City Chiefs fan, so she absolutely loves the inside of the purse (inside of the outside pocket is Chiefs too). The day she got it, she had to show everyone in the office the inside of her purse. It was so funny, the Chiefs had just had a pretty bad loss the day before, so one of the ladies asked if it was on the inside because she was ashamed of the Chiefs.


Head on over to Amylouwho to check out the rest of the Sew & Tell items!

(Oh, and a quick update on the hand warmers - I'm about 1/2 inch from the thumb hole on the first one, so it's 7.5 inches long! Woo-hoo! I promise I'll try to get a picture of it this weekend to share.)

Until next time...
Sunday, October 31, 2010

Gussie bag - final bag swap version


Oh, I'm so excited about this! I'm so glad I stuck with this bag & didn't give up & resort to another pattern, I'm just loving how it turned out. There seems to be an extra bit of satisfaction from the fact that while this pattern probably isn't ground-breaking in its originality, it did come straight from my mind, not from a pattern I have purchased.

And now that my partner has received her bag, I present to you, the Gussie bag!


Isn't it pretty?! While this fabric probably isn't one I would have normally picked up, I absolutely fell in love with it the more I worked with it. It's a perfect blend of fall colors.


As I was working on getting the pattern pieces cut out, I tried to decide what I wanted to do for the front pocket. On the first versions of the bag (I still have a third one I haven't shared yet) as I was working on the pattern, I embroidered a little something on the front to make it a little less plain. I knew I couldn't embroider on this one because the pattern was just too busy for it, but I also knew I wanted to do something to break up the pattern on the front side (the back is all the print fabric, I forgot to take pictures of that).

I toyed around with the idea of making the front panel all out of the brown interior fabric, or making the center pocket (that wide panel on the front is split into three pockets) the print material, or trying to appliqué a piece from the print onto the panel (which with this print would have been really difficult), then though of just putting a band of the print across a brown panel. I liked that last idea best, but thought it might look a little out of place, until I remembered the gathered clutch from Noodlehead that everybody has been doing lately. A-ha!!! I could make the brown part gathered or pleated, then add the print piece as a band across it! I remembered that at one point my swap partner had mentioned she liked pleats on bags, so it was a win-win situation. I quickly cut out a new front panel (seriously, this was a last-minute, game-time decision after everything was already cut out), adding about four inches to the width, then tried my hand at gathering. It took a couple tries, and I wish I had added more than four inches, but overall, I love how it turned out. It breaks up the pattern on the front of the bag while still adding to the overall look of the bag.

Here's a closeup of the gathers. Like I said, I wish I had added more to the width of the piece so it could have been gathered more. But I do still think it came out nicely.


The inside has another full panel that was split into two pockets.


On another trial version of this purse (the one I haven't share yet, it's wider than the first two I showed), I had yet another panel pocket on the inside that wasn't split at all. For me it's perfect because I like to keep receipts & other papers separated in my purse, and the pocket keeps them from getting all crumpled & lost at the bottom of the purse.

And here's my lovely gusset on this version. I opted not to do the bias tape method (the one with embroidered flowers), and somehow managed to get the gusset to turn out nice & crisp, unlike the very first one (the one with the embroidered heart).


I'm telling you, I don't think I could have been happier with how this turned out! I'm toying around with the idea of making a tutorial and/or a pattern for this, but the thought of all the pictures & explanation that would be needed make me think I'll probably push that aside if I'm being honest with myself. Right now, with the exception of one freezer paper stencil piece (with a few notes on it), the entire pattern is just in my head. Trying to sufficiently explain some of the steps could be difficult, even if the overall construction of the purse isn't terribly hard. I'll admit, attaching the gusset will certainly try your patience, but I think it's all worth it in the end. At the very least, I'll add this pattern to my list available for custom order, so just shoot me an e-mail or leave a comment (make sure your e-mail address is attached to your profile, or you include it in your comment!) if you're interested.

Oh, and if you really, really want a pattern or tutorial for this, just let me know. If enough people want it (seriously, it would probably only take a few), I'll be much more likely to take the time to do it. I have to tell you, while I have always fully respected people charging for their patterns before, I have a whole new understanding for it & can appreciate it even more when they offer free patterns & tutorials. When it comes to charging for patterns, I think Rae explained it best when she talked about her Bonsai Bag pattern.

Until next time...
Sumo Sweet Stuff
NightOwlCrafting
Join  us Saturdays at tatertotsandjello.com for the weekend   wrap    up           party!