Thursday, June 30, 2011

Time to share YOUR Teardrop Bag

It's my favorite time of the month again - time to share your Teardrop Bag!

IMGP0114

Each link up below is your entry to win this month's prize from Sharon at A Prairie Sunrise - a custom piece of jewelry & custom sketch book!

CIMG0159

CIMG0112

CIMG0109

CIMG0944

I think you already know the drill by now, but hopefully we've got some new people this month! As always, only links entered below will be considered for the giveaway drawing, not links entered as comments. You may enter more than once ONLY if you completed more than one bag, and each bag must be in its own blog post or Flickr photo & have its own link below. Please remember to link to your specific blog post or Flickr photo, not the main page on your blog or your Flickr profile.

Entries will be open through midnight on Friday, July 8. That's right, you've got a full week to finish up your bag if you haven't already & get linked up. Winner will be announced Monday, July 11.

What are you waiting for?! Let's see those Teardrop Bags!


Until next time...

Wednesday, June 29, 2011

WIP Wednesday #20

WIP Wednesday at Freshly Pieced

I'll be short & sweet again this week!

Started: Nothing new.

In Progress: June block for the String Me Along bee. I'm still hoping to do some sort of variation on the circle of geese, but haven't decided yet. I do have pieces cut out for my second practice block, but no work yet on the official block.

circular geese

Goose's quilt. I forgot to take pictures when I had the rows all laid out, but now I've got two seams left until the top is all put together! I'm getting more & more excited about this, but now I need to decide how I want to do the back. I have this half yard bundle to work with:

David Walker - Boys Will Be Boys

My original plan was to do 12" squares on the back of everything except the blue dots, then use the blue dots to make about a 3" border around the whole thing. Last night I was thinking maybe I just want to do wide stripes on the back. I plan to hand quilt it with random circles all over. So which do you think, stripes or squares? Here's the front again, in case you've forgotten:

Postage Stamp Quilt

No progress on the crochet blanket or Christmas gift. Blah.

Completed: Nothing new.

Make sure you head over to Freshly Pieced to see what everybody else has been up to this week.

Until next time...

Tuesday, June 28, 2011

Teardrop Bag: Completed!

I had hoped to share this the end of last week, but Mr. Sun has been less than cooperative for me to be able to get decent pictures. Well, not cooperative on my schedule, at least! The nerve...

First let's have a little reminder of what the Teardrop Bag is supposed to look like, since I went a little in my own direction. Anybody surprised?! :)

IMGP0114

I chose to make the small version, and I'll be the first to admit I'm a terrible judge of size when looking at finished dimensions on bags & such. And honestly, I'm not even certain I looked closely at the finished dimension before I got started. I knew what fabric I had on hand that I wanted to use (remember, I'm trying to sew all projects from my stash), and I knew I didn't have enough for the large bag. Don't get me wrong, I'm happy with how it turned out, and it's really a perfect size if you want a nice, small bag to throw a few things into & run out the door. But for me, it's definitely not big enough (and doesn't have nearly enough pockets!) to be an everyday purse. Good thing I didn't make it with keeping it in mind.

I mentioned before (and had issues!) that I chose to put the pocket on the outside, rather than inside, of my bag. Because of the size, it would have been more of a divider on the inside than a pocket, so I figured it would be more useful on the outside.

Teardrop Bag

I just used pre-made bias tape to edge the top of the pocket to add a little extra contrast. I toyed around with the idea of doing it like the side pockets on the Cosmo Bag, but in the end stuck with the bias tape.

Because of the width of the pocket piece, I couldn't really figure out how best to do the pleat so that the finished width was the same size as the pocket. I'm still not sure how those of you who did the pleats correctly did it, but I'm okay with how mine turned out. The pleat kind of "opens up" to add more space.

Teardrop Bag

The opening of my bag ended up really small, and there was absolutely no way I was getting it in the machine to add the side hips. It's a cute detail, but thankfully I don't really miss them. I don't think they would have interfered with the exterior pocket, if I remember correctly when I was trying to add them, they cam just to the top edge of the pocket.

Teardrop bag

Overall, I think the pattern was a good one. I think this size would be perfect if you wanted to make one for a little girl who loves purses, although you'd probably want to adjust the strap length in that case. I didn't get any pictures of myself holding this purse, but it does fall pretty much the same as it shows in the book photo.

And you know I can't go without saying - I still think this bag was easier than the Cosmo. ;)

Until next time...

Wednesday, June 22, 2011

WIP Wednesday #19

WIP Wednesday at Freshly Pieced

Another week, another Wednesday! Sorry for the lack of progress the past few weeks, hopefully you can understand we've got just a few others things going on. ;)

Hopefully I can keep this all straight. It feels like it's been so long since I've done a real update, and everything is becoming hard to keep track of, so sorting out what I actually did this week seems tough for some reason.

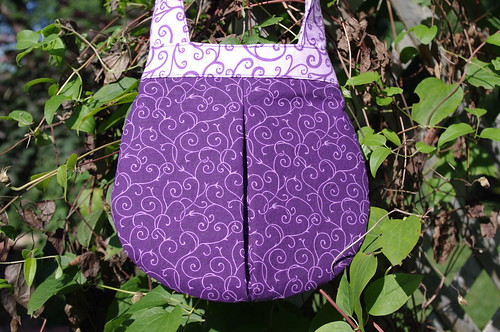
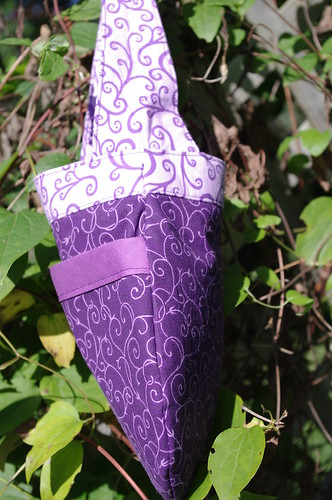
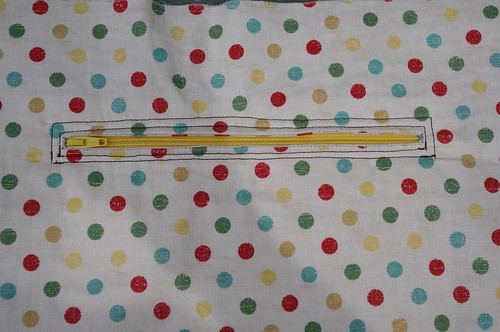
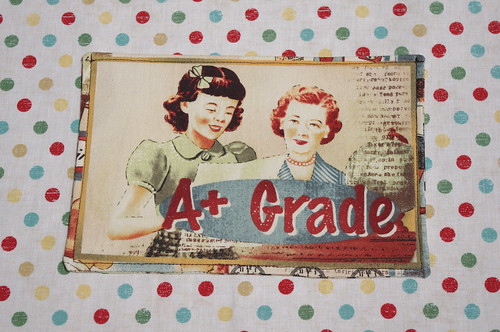
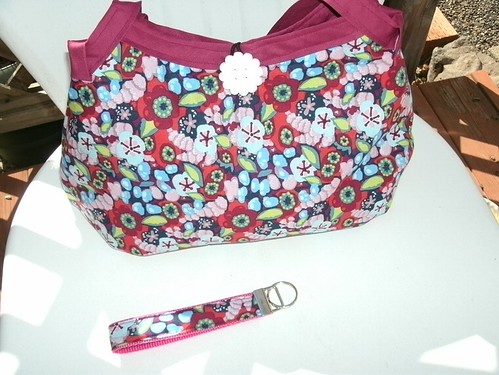
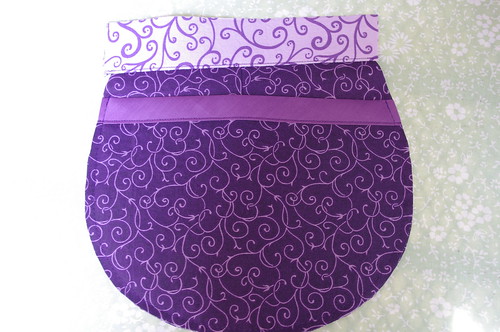
Started: The July project for the Style Stitches Sew along, the Key Keeper Coin Purse. I won't be sharing the completed project until next month, but I used the same fabric as I did for the Teardrop Bag.

IMGP0115

I'm excited for cutting instructions for the Kaleidoscope quilt along this week so I can get started on that.

Still thinking about what I want to do for my bag. Would you believe I'm actually considering making another patchwork Mabel?!

I've started brainstorming what I want to make for my June block in the String Me Along bee. 
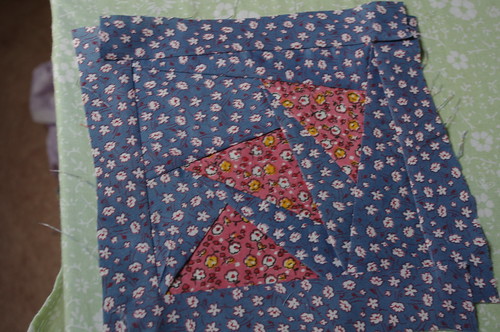
N.Ramirez has requested a Flying Geese block, which will be my first. Of course, since I enjoy making things difficult for myself, I decided now would be a good time to try out paper piecing for the first time as well. Might as well jump in with both feet, right?! I found this Circular Geese block & gave it a try with some scrap fabric I have for this sort of thing. Other than not knowing how to count (who knew 8 doesn't come right after 5?!), I'm really happy with how it turned out (yes, I added a border since I was just doing the one block instead of all four), and actually really enjoyed the paper piecing process. I'm not certain I have enough fabric to make the full circle, so I'm trying to figure out how to incorporate one or two of the pieces.

circular geese

A question to those of you who have done paper piecing before - how do you do it without wasting a bunch of fabric? Because I was working with cheap-o fabric that I really don't care about (I got a "bolt" of 5 yards from Wal-Mart when they were clearancing it out, and it's definitely not quality fabric, so I don't care much about waste. And also, pretty ugly!), I was just lopping off chunks, sewing them into place, then trimming off the excess. Because I want to waste as little as possible (and only have a set amount to work with), I'm trying to figure out the best way to go about it. I did print out another copy of the pattern & cut out the individual pieces & figure I can use those to cut the specific pieces (with a seam allowance, of course), but is that the best way?

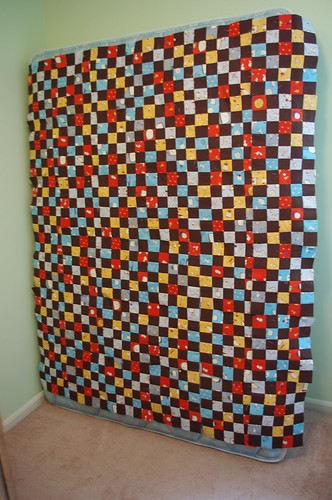
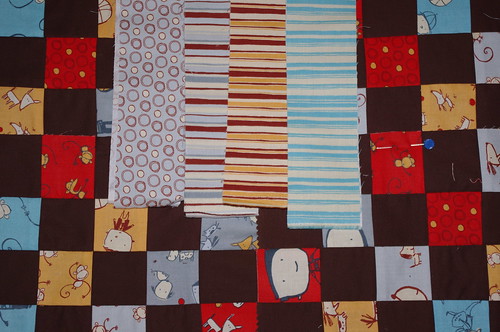
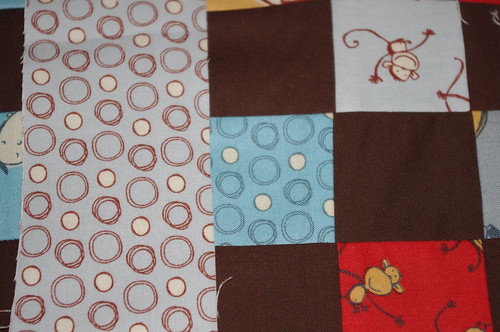
In progress: Still plugging away on Goose's quilt. Not really any new progress, but the blocks for the last two rows have been pulled off the mattress "design board," and are waiting to be sewn together. Then I just need to sew the rows together, quilt it, and bind it! It feels like I'm heading into the homestretch on it, but I also have so many other things I want to work on, it keeps getting pushed aside. At this point, I'm feeling like it probably won't get done before Goose gets here, although that's still by goal. Only 8 weeks until he's due, and 10 at the max before he gets here. Yikes!

Crochet blanket - no progress. I'm avoiding it since I know I need to start over on it since I screwed it up. That's what I get for ignoring the pattern & doing things my own way. ;)

The Christmas gift. I hope to have this done by mid-July at the latest. Hopefully.

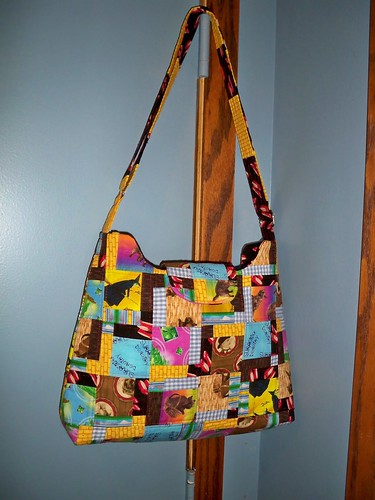
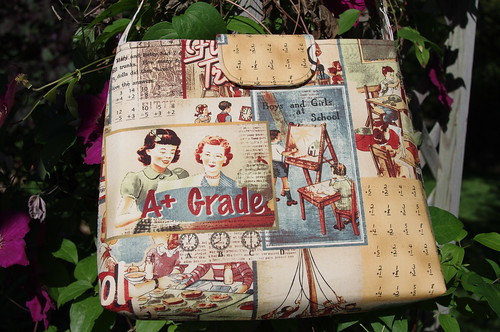
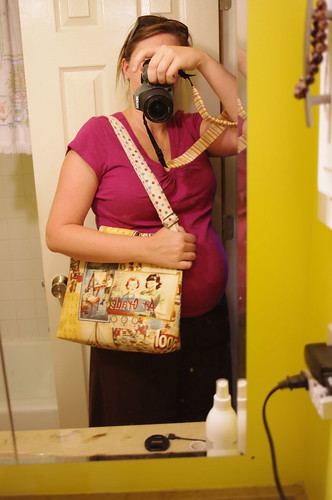
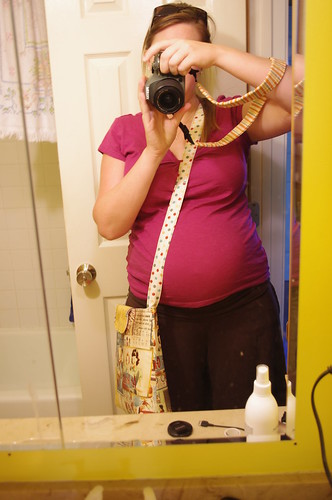
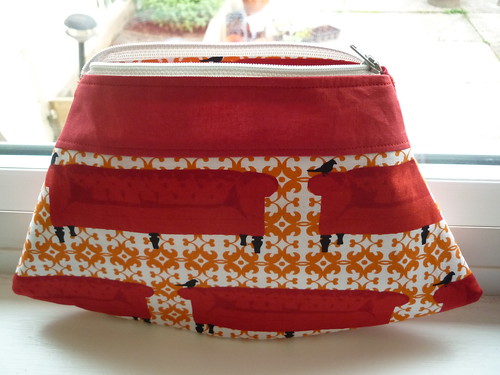
Completed: I managed to finish up both the Teardrop Bag and the Key Keeper Coin Purse this week! Thankfully the coin purse was super quick & easy - about an hour start to finish - which is exactly the kind of project I needed.

Make sure you head over to Freshly Pieced to see what everybody else has been up to this week.

Until next time...

Monday, June 20, 2011

Teardrop Bag: Inspiration

This month is getting away from me again, and I have a feeling the next few will as well! Time for a little inspiration if you're still working on your Teardrop Bag. I finished mine up over the weekend, but I'll wait until later this week to share it.

IMGP0114

Even though summer is in full swing now, I still love the fall colors on this bag from weiswomen. Plus the pleat looks just perfect!

Amy Butler Teardrop Bag Large

And another pretty version from weiswomen.

Amy Butler Teardrop Bag Small

Sarabethe didn't use a contrasting fabric for her band or strap, and I love how it looks. I especially like her interior fabrics.

DSC_0644

DSC_0650

You've still got plenty of time to get your bag done by the end of the month, even if you haven't started yet. This one comes together fairly quickly, and like Sarabethe above, I think my biggest struggle was getting the strap turned out the right way. My best advice is to follow the instructions to leave an opening in the middle of the strap (seemed weird to me, and I'm glad I went against my gut not to do it that way), and use a smaller seam allowance. Using 1/2 inch seam allowance leaves you with a pretty narrow strap that's difficult to turn right-side-out. It's not impossible, but I wish I had just used 1/4 inch allowance instead to make it just a bit wider.

Until next time...

Thursday, June 16, 2011

Old School Modified Mabel

Time to reveal the secret project! I hope it's all it's cracked up to be after I've been talking about it for a couple weeks. ;)

I picked up this fun retro school print & matching polka dots at my local quilt shop. I wasn't super crazy about them in the beginning, but the bag was for someone who worked in a school, so I thought it was a good fit. Now that it's all said & done, I couldn't be happier with the fabrics I chose!

IMGP0194

I used the same pattern as I did for the Wizard of Oz bag back in December, the Mabel Bag from Jenna Lou Designs, but modified it just a bit. Yes, I know that I said back then I would never make this bag again. I absolutely love the finished bag as written, but it was such a pain to make! I realized after making it the second time that I certainly made it a lot harder on myself the first time by using the patchwork. I love the finished look of the patchwork, but it was so much more time-consuming to have to make my "yardage" before even starting on the bag.

Mabel bag

The only change I made to the pattern was to straighten out the top, getting rid of that curved part. I love the look of it, but the Peltex makes it so stiff that it's really hard to maneuver around my sewing machine. Getting it sewn together at the top the first time was really difficult, but not impossible since all the misses on the curve are hidden inside. Unfortunately, there was no way to top stitch it & have it look nice on the outside, something that really bothers me not to be able to do. Straightening out the top of the bag made it much easier to put together & I was able to top stitch once it was all put together, so I was much happier with the newer version.

Modified Mabel bag

I did add the zippered pocket to this version. I didn't on the WOZ bag since I only had enough fabric left for the lining & didn't have any extra in case I screwed up. This was my first try at a zippered pocket, and while it didn't turn out perfect, it at least worked.

IMGP0196

I'm not crazy about the double border on it, and wish I had used lighter thread so it didn't stand out so much since it doesn't look so pretty. But like I said, it's functional, and that's what matters!

I didn't use the instructions for the zippered pocket that came as part of the pattern because I just couldn't figure out what I was supposed to do. Instead, I used instructions for a zippered pocket that came in the Sweetheart Shopper pattern from Keyka Lou. After the fact (of course!) I found out that The Bag Making Bible includes instructions for doing zippered pockets. I did look at the book when I was trying to find good instructions, but silly me, I looked in the Pocket section. Turns out the instructions are in the Lining section, and they look like a piece of cake, so I'll be trying that method next time.

I also added a simple slip pocket to the inside because I couldn't resist some fun fussy cutting for the pocket.

IMGP0200

The front & back of the bag are each a little bit different.

Front
Modified Mabel bag

Back
Modified Mabel bag

I made an adjustable strap (using this hardware, also from Jenna Lou Designs) so it can be carried over the shoulder or across the body. I can't remember exactly, but I think my strap was about 56", so it's plenty long, even when extended all the way.

Modified Mabel bag

Modified Mabel bag

All in all, I'm really happy with how this turned out, and even happier since the recipient loved it! And since it was so much easier this time around, I'm already planning another one for myself.

Until next time...

Wednesday, June 15, 2011

WIP Wednesday #18

WIP Wednesday at Freshly Pieced

Not a single crafty thing has happened since last week. Except I'm still, you know, growing a baby. A very, very active baby!

Hopefully nobody worried about me too much the past week, we went out of town for a much-needed vacation & it's been hard getting back into the swing of things. All things sewing & crafty will resume this weekend (hopefully!), and I'm excited to be able to share the secret project in a few days as well.

I'm still working on plans for my bag, but now I'm torn between the pattern I was going to use (a modified version of the Wizard of Oz bag I made) and Sara's new tutorial for the Naughty Secretary bag. Decisions, decisions!

I think I've also made a decision on the fabrics I want to use for the Kaleidoscope quilt along with Elizabeth. I need to pick up just a few fat quarters to add to the yardage I'll be using from my stash. I do have a charm pack that I'm hoping to pull some pieces from, and I'm planning to use the big polka dots in place of my solid.

IMGP0209

Here's hubby and I at my sister's graduation this weekend. Yes, I am getting to be as big as a house. ;) It's hard to believe that in just nine short weeks this little guy is due!

IMG_5785

Hopefully everybody else had a productive week!

Head on over to Freshly Pieced to see what everybody else is up to!

Until next time...

Wednesday, June 8, 2011

WIP Wednesday #17

WIP Wednesday at Freshly Pieced

I'll be short & quick this week since that's the kind of week it feels like it's been.

Started: Nothing new. I am planning to join the Kaleidoscope quilt along & am planning a new bag for ME! I haven't sewn anything for myself in a while, so I'm excited about that.

In progress: Goose's quilt - no progress. I have the fifth row pulled down & pinned together, but not sewn yet. Two more rows up on the mattress.

Crochet blanket - I think I need to start over. I improvised a bit & it's getting screwed up. Thankfully I only have about 5 rows done, so it won't be much to pull apart if I decide to go that route.

June's sew along project, the Teardrop bag. I ran into a few issues over the weekend & haven't worked on it since, but I think I got my big problem with the pocket sorted out at least.

The Christmas gift is...ummm...well, in progress. :) I was all crazy about getting it started & done a couple weeks ago, but now I've gotten stalled on it again.

On hold: I-spy project.

It's not exactly been a productive week, but the past few weeks have been good so I can't complain too much. We're back over at Lee's this week, so make sure you stop over to Freshly Pieced to see what every body else has been up to.

Until next time...

Tuesday, June 7, 2011

May winner!

So sorry for not announcing this yesterday like I said I would, things have been a little nuts around here! So I'll keep this short & sweet.

The winner of the great bag & keyfob from Bree at B Sew Crafty

may giveaway

as chosen by Mr. Random

winner

which just happens to be

'Perfectly Pleated Clutch'

from Nellie's Niceties! Congratulations! Please send me an e-mail with your contact info so you can get your prize.

I'll warn you now, it's going to be a quiet week around here, but I should be able to share the secret project next week!

Until next time...

Sunday, June 5, 2011

Oops...

IMGP0207

Lesson learned: attach the band before attaching the pocket to make sure the two are parallel. Oops. Luckily I only basted the pocket on, so it was relatively quick & easy to take off to reposition.

So far I've only gotten as far as getting the exterior put together, excluding the "hip" pieces. My thoughts so far...

I'm making the small version, and it definitely is small. I knew it would be judging from the picture in the book, but I guess I still didn't know exactly what to expect.

IMGP0114

The pattern piece for the top band says to make it 8.5 inches, but after I sewed the pleat in the bag, the top of it was only 8 inches. I'm not sure if it's something I did wrong, or if the pattern just calls for extra on each side.

Speaking of the pleat, it was kind of awkward to figure out. I'm never certain just how pleats are supposed to fall all the way down the bag, so I just compared it to the pocket piece I had cut out. I was surprised at how much smaller the pocket piece is than the exterior. I got to thinking about it, and when you put stuff in it the pleat will open up making a little more room.

The photo above is actually the exterior of my bag, I decided to add a pocket to the outside. I haven't made up my mind yet whether I want to put one on the inside. It basically would just divide the inside into two separate compartments rather than being it's own separate pocket. Make sense? The solid purple band at the top of my pocket is just a piece of bias tape that I sandwiched around the top of the two pocket pieces.

I haven't sewn the hip pieces on yet, and while I think they're a really cute detail on the bag, I'm wondering how easy they'll be to put on. Like I said, the small version only has an 8 inch opening in the top, so it could be tough getting it on the machine to add the hip pieces. We'll see how it goes, I may end up leaving them off. Either way, I think it'll still look good since it's got the contrasting band on the top.

So far it's come together fairly quick & easy. I only have to cut out & put together the interior & strap, then I'll be ready to put it all together. Hopefully the rest is as easy as it's been so far. Other than my own silly mistake sewing the pocket on crooked, it's been a pleasant experience.

I think I've said it every month since January, and I'll say it again - I'm pretty certain this one is easier than the Cosmo Bag. So if you conquered that beast, you can certainly tackle this one! :)

I hope every body's having a good weekend!

Until next time...

Friday, June 3, 2011

Kaleidoscope Quilt Along


I almost can't believe I'm committing to this when I haven't even finished up Goose's quilt for the last quilt along, but I just don't think I can pass this up! Elizabeth at Don't Call Me Betsy is hosting a Kaleidoscope quilt along, and I think I'm going to give it my best try to make the baby quilt. Only 12 fat quarters & a yard of coordinating solid for the front? Sounds good to me! And I just picked up some of the Denise Schmidt fabric last week, so it seems like a perfect use for that (I just got the blues/greens), and I'll throw in some random scraps & such from my stash, so other than picking out a solid, I should already be set! Come to think of it, I've got some dark grey I had picked up for something else that I could certainly use, and would look good with the other fabrics. Even better! If you're interested in joining along, make sure you check out fabric requirements & recommendations Elizabeth just shared.

Until next time...

Thursday, June 2, 2011

June: Teardrop Bag

June? June?! Where in the world have the last five months gone? I can't believe it's June already!

If you haven't yet, don't forget to go enter your Perfectly Pleated (or unpleated!) Clutch for your chance at the May giveaway! Entries close tomorrow (Friday).

This month we are working on the Teardrop bag. There are two size options, I've decided to make the small bag.

IMGP0113

Before you do anything else, remember there is a pattern correction on the Large Teardrop Bag. Instructions for the small bag are okay, only the instructions for the large bag need to be updated. Make sure you check your book & see if this correction needs to be noted. Printings after November 15, 2010 should be corrected in the book, so yours might be okay, but please check to be sure!

I have a few changes in mind for this bag, nothing big, but I'll be sure to share them when I get it done. I've got my fabric cut out for the exterior of the bag, and will hopefully be able to get started on it this weekend. It doesn't look like it should be too difficult, but I guess we'll see!

I'm using the same purple fabrics that I did on this bag. So far I'm still going strong on my goal to use up my stash for the bags in this book! Chances are good I'll use the same fabric to make the matching Key Keeper Coin Purse next month (she's holding it in the photo below).

IMGP0114

It's time to start thinking about what fabric you'd like to use for your Teardrop bag & get sewing! I look forward to seeing what you make this month. Remember you can upload photos & ask questions in the Flickr group as we go.

This month's giveaway is sponsored by Sharon at A Prairie Sunrise. I was lucky enough to be paired up with Sharon last year for the Sew, Mama, Sew bag swap & finally convinced her to get her blog started last fall. She's also the one who got me involved in the String Me Along quilting bee! Sharon is offering a custom piece of jewelry and a custom sketch book to this month's winner. Here are some examples of her beautiful work:

CIMG0944

CIMG0109

CIMG0112

CIMG0159

I can't decide which I like best, I love them all! :)

Until next time...

Wednesday, June 1, 2011

WIP Wednesday #16

WIP Wednesday at Freshly Pieced

Wednesday snuck up on me a little quicker than normal with the holiday this week! That means a short week, which is nice, but why do the short weeks always seem to last longer than the normal ones?

Started: A secret project that I can't share for a couple weeks. Sorry, you'll just have to stay in suspense until then. But I can share the fabric. I was a little unsure about this when I picked it up, but now I love it.

IMGP0194

June's bag for the Style Stitches Sew Along. I'm using the same fabric as I used for this bag. I have a sneaking suspicion the same friend is going to want this one. :) I've got most of the exterior pieces cut out & fused to the interfacing, but I'm making quite a few changes to the pattern (go figure), so I haven't actually started sewing yet.

In progress: Goose's quilt. I have four rows sewn together & the fabric for the backing came last night. I've decided to go (relatively) simple on the back, I'm just going to do 12" squares from the same prints that are on the front with a border of the bright blue dots. I'm trying to decide what to use for the binding though. I was originally thinking of just using the bright blue dots, but since I'm going to use that as a border on the back I've changed my mind. I have just enough strips left from the original jelly rolls that I could use, so I'm trying to decide if I want to use just the stripes, the stripes with the light blue dots, or the stripes with both the light & bright blue dots. Decisions, decisions!

IMGP0190

Here's the light & bright blue side-by-side:
IMGP0193

The Christmas gift & crochet blanket aren't making much progress, but I was busy with other stuff this week.

Completed: The secret project. I worked on it pretty much all day Monday & was happy to get it finished up in only a couple of days. I wish I could share it with you now! :)

On hold: The i-spy project.

Overall, it's certainly been a good week! Having Monday off was a big help, but I just seemed to be more productive than usual, which is nice. Maybe that nesting thing is starting to kick in, too bad what I really feel like doing has nothing to do with Goose! :)

Lee is taking a break this week, so go visit Elizabeth at Don't Call Me Betsy to see what everybody else is up to!

Until next time...