Monday, November 28, 2011

Cyber Monday shopping

If you aren't already all shopped out from Black Friday & all the other weekend sales, make sure you check out these great shops. Huge thanks to Julie at Vibrant Designs for putting together this list.


Vibrant Designs is a small shop that carries jewelry, accessories, and bags. I am so excited for the upcoming Christmas holidays, so I've decided to have a great sale on all ready to ship listings! On Cyber Monday, you will enjoy 30% off our clearance items and 20% off the rest of the items in my shop. To top it off, I'm extending FREE SHIPPING for one day only! Just use the coupon code CYBERMONDAY to redeem your discounts! Come follow my blog and watch for a unique Vibrant Designs Christmas Giveway!


___________________________________________________________________________________


a girl and a glue gun
shop
is a place where i sell all my extra crap leftover from my blog! I've got

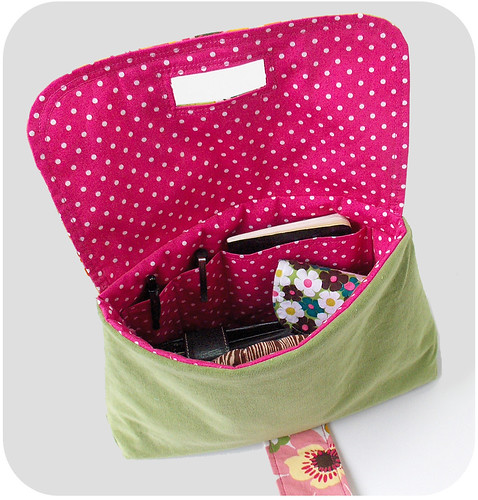
levi aprons, rings, keychains, handwarmers, animal scarfs, and all sorts of other random crap!

Everything in the shop is 15% off for CYBER MONDAY only! come by and say hi!


__________________________________________________________________________________


Bumblebee and Sophie is a children’s clothing and accessory company that provides unique designs in playful fabrics for baby girls ages three months to three years. We have branched out into boy clothes with a tunic style shirt, vests, and pants, sizes newborn(vests) to three years. We offer custom sewing machine covers and would love to create custom nursery bedding for your new little one.


We are excited for Cyber Monday and will offer 20% off and free shipping for all in stock items. (sorry not on custom orders)

__________________________________________________________________________________


Fun, colorful gifts and stocking stuffers! Posies In my Pocket specializes in unique accessories for the girly girl in all of us! I hope you enjoy my items as much as I do making them!


On Cyber Monday, all orders placed will receive 15% off the entire shop!! Use code CYBERMONDAY at checkout.


__________________________________________________________________________________


Happy Holidays from Posie Hill Farm Treat Stands, Cake Plates and Pie Plates make lovely holiday gifts and are the perfect way to display your special holiday treats. Take a look around and enjoy my little shop filled with handmade, recycled, vintage and vintage inspired items for the home. On Cyber Monday, enjoy 15% off all purchases using the code CYBERMONDAY!


__________________________________________________________________________________


Specializing in custom handmade, original and unique nursery and children's artwork. Each piece is one of a kind. My nursery prints are whimsical and primarily made from different patterns and textures to create a paper collage. Receive 10% off any piece of nursery art with the code CYBERMONDAY. Enjoy!


__________________________________________________________________________________


The Country Chic Cottage etsy shop has a mixture of vintage and handmade goods for your home. Custom barnwood signs can be ordered with your choice of quote, name, or word. Take 25% off anything in the store with code TAKE25 -- free shipping in the US everyday. Be sure to also follow along on The Country Chic Cottage blog for further updates.


___________________________________________________________________________________


Beez Kneez is a true mom and pop shop with all of our products being made by us in our studio in California. All of our supplies are from suppliers here in the USA. We specialize in personalized and customized apparel and accessories for children. Customers can save an extra 20% off our already great sale when using the coupon code CYBERMONDAY.


____________________________________________________________________________________


A Bit of String carries handknit and crocheted accessories and photo props for little ones. Each item is handmade with special attention to detail, and the shop is a favorite among moms and photographers. Many items will be discounted through the Thanksgiving weekend, so be sure to check the shop. Also, check out their Facebook page to be notified of new listings. Use coupon code FREESHIP10 for free shipping from Black Friday through Cyber Monday!


___________________________________________________________________________________


Whimsical and fun, yet vintage and classic. I love to accessorize with color and it shows by what I sell. Wear something surprising and shop vixenMade. Get 20% off all items in shop on Cyber Monday. Use the coupon code CYBERMONDAY to get your discount and have fun shopping! In the meantime, come visit my blog for more crafting fun!

___________________________________________________________________________________


1499 Vintage is a Vintage shop with lots of carefully selected home decor, house wares and accessories.
We are a husband and wife team of vintage lovers and are always on the hunt for that oh so special item to add to our shop next.
Visit our shop for a great assortment of special finds that will add some unique character to your home.
On Cyber Monday we will be offering a 10% discount on everything in the shop :)
Follow the blog for updates on new arrivals and other special offers.
___________________________________________________________________________________


Babes&Sages is a handmade shop selling mostly boho style headbands in many different colors and styles.
I use gorgeous lace headbands and different new and vintage fabrics and buttons to create a truly special look.
You will also find some felt headbands as well as jewelry. Please stop by frequently as stock changes.
On Cyber Monday you can save 20% on all items and on top of that all headbands are always free shipping!!!
Follow the blog or facebook page for updates on new arrivals and other special offers.
___________________________________________________________________________________


Unique, hand cut designs made for fashionable kids.


ZLilly Accessories carries a variety of applique shirts and onesies to suit your child's personality and interests-and be easy on your wallet! We also create one-of-a-kind designs for custom orders (great for Christmas gifts, wedding parties, baby showers, family pictures).


Receive 25% off ZLilly purchases (does not include shipping or custom orders) with code CYBERMONVD.


Happy Holidays! Want more information? Please follow us at How Do U Like Them Apples? for crafty goodness and other product information.


___________________________________________________________________________________


Come and get some Christmas shopping done at The Kiki Comin Shoppe! The Kiki Comin Shoppe is filled with fun and funky prints for your home, your friend's home and anyone else you can dream up! On Cyber Monday ONLY you can recieve 25% off all of your print orders by entering the code CYBERMONDAY. A customer favorite "I love you because" print would be a perfect gift for your home, for your child or even grandchild! You can see how I have decorated with this print in my home HERE. There is everything from Family Trees to You Are My Sunshine prints. Head on over and see us HERE..and drop by my blog, Kiki Creates, for special deals going on all week!
___________________________________________________________________________________


Oh hi, I'm Amie. I run a little shop called {Kitty Cats and Airplanes} that's full of whimsical and romantic vintage-style jewelry. I also have a {blog} with tons of crafty tutorials and a {facebook page} where I like to run special friends only promos! Speaking of promos, since it's Cyber Monday, I am having a huge sale! 30% off everything in the store using code CYBERMONDAY (original huh?) If that isn't good enough, all orders over $20 get FREE shipping! Hold onto your socks, I've got one more. See those cute rose bud earrings? For every $30 you spend, you get a free pair in any color you'd like. Awesome. Happy shopping!

___________________________________________________________________________________


My name is June & my Etsy shop is CreationsByJune. I have pre made scrapbooks, upcycle necklaces and scarves, a few purse and lots of vintage patterns. In honor of cyber Monday, for November 28 through December 2, ALL shipping is FREE and all purchases over $50 will get 10% off! Coupon code for free shipping is 2011CYBER, and then convo before paying for the 10% off! You can also find me in blog land at Creations By June.


I look forward to seeing you!


__________________________________________________________________________________


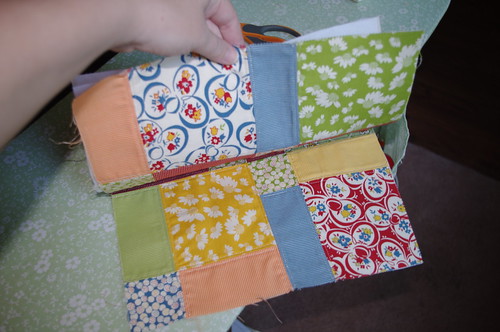
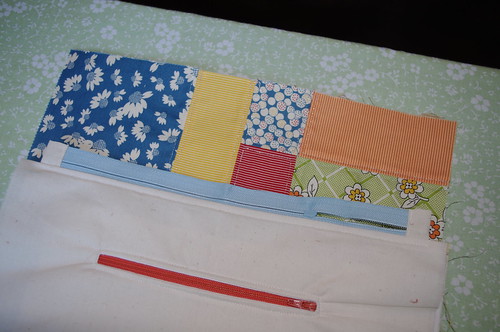
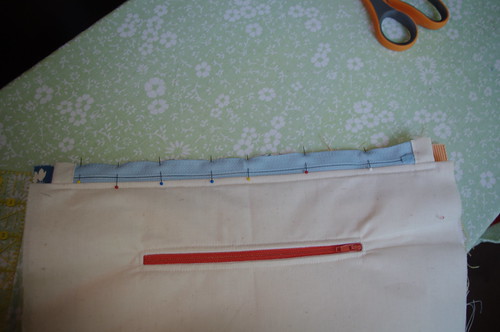
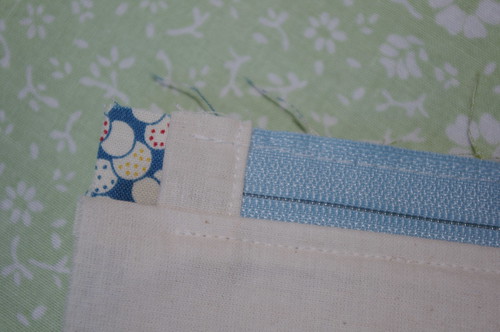
CJ's Craft Corner is a mother-daughter team. Our shop specializes in "fabric creations to brighten your life". We love making affordable, quality, colorful items like tea wallets, car trash bags, mug rugs, and more. Our Cyber Monday sale will run from Friday, November 25 through Monday, November 28. Use code CYBER15 to save 15% off any purchase (not including shipping). Check out our facebook and twitter too!


___________________________________________________________________________________


Hi there! My name is Kara and I am the owner of Mine for the Making {shop} and the blogger behind the Mine for the Making {blog}. I love to make whimsical, vintage inspired jewelry and hair accessories for girls of all ages. Being a girly-girl and having a daughter fuels my passion to create handmade pretties! Besides making things for my shop, I love to be a mommy, craft, paint, cook, bake, teach, learn new things, laugh, work on our home, and blog :) Check out and Facebook page and follow me on Pinterest!


Get 30% off EVERYTHING in the shop with coupon code CYBERMONDAY30
___________________________________________________________________________________
Welcome to Shop Bugaboo! Here you’ll find fine art, stationary, jewelry, accessories, baby and toddler items, home goods and apparel at a reasonable price. Many of our creations are upcycled, recycled or thrifted and all are brought to you on a dime; our goal is to provide everyone with beautiful, quality handmade and unique items - whatever your budget. Our Cyber Monday sale gives you a whopping 40% off everything in the shop! It begins at midnight on Sunday and runs until midnight on Monday, and will include many new listings of stationary, jewelry, wreaths and more! Be sure to stop over for your Christmas shopping and decor needs!


Fields of Gold wrapped washer necklace


Sunshine Wreath


Season's End - Watercolor and Ink


Wednesday, November 23, 2011

WIP Wednesday #31

WIP Wednesday at Freshly Pieced

I'm happy to say I've actually gotten quite a bit done in the two weeks since my last WIP update! Unfortunately none of it has been the Christmas gifts I hoped to start working on, but hey, progress is progress. Right?

New Projects: Kat was still looking for blocks for her Cheeky Quilt, so I made a couple for her. I didn't sign up the first time I saw her mention it (I just happened to notice that her first request was the same day Coop was born!) because her original October deadline just wasn't going to work out for me, so I was really happy to be able to help after all. I really enjoyed making these scrappy log cabins, and was so happy with how quickly they came together.

Kat mentioned that she likes bird & vintage floral prints, so I combined the two for this first block. Yes, it sounds like an odd pairing, and when I originally pulled the fabrics for it I worried it wouldn't be bright enough, but I love how it turned out.

block 1 for Kat

The second block is truly from my scrap bins, with lots of fun memories. There are the elephants from my last round in the Pretty Little Pouch Swap; dots & monkeys from Coop's quilt; the green fabric from my nursing cover & carseat handle; Denise Schmidt prints from all those origami bags; a couple of my favorite Riley Blake Rainy Days & Mondays prints; and both prints from one of my favorite Keyka Lou City Totes.

block 2 for Kat

Baby Charlie's outfit & football was probably one of my favorite things to work on over the past week.

100_1301

I started another knit scarf, which I need like a hole in the head, but I absolutely love scarves in the winter. Unfortunately the ones I find in the stores are never long enough, so I have to make my own. Ah shucks.... ;) This is just a bit of a test piece to make sure the checkered pattern I've been wanting to try out for a while would look okay. I absolutely love this bright peacock blue & hopefully I can get some progress made on it this weekend. I'd like to do an ear warmer & possibly hand warmers to match.

checkered scarf

I did work on one other secret project, but I'll have to wait to share that one. It's pretty darn cute though, so hopefully I can share it soon!

Ongoing projects: I've changed my mind about the quilting on Coop's quilt. Nothing drastic, I'm still doing the circles, but I've added some straightline quilting as well on the diagonals. The straight lines obviously go a bit quicker than the circles, which is part of the reason I decided to go this route. I also like the idea of mixing things up even more, so now there will be circles, straight lines, and Xs. I do like how it's looking so far, so I think it's a good decision.

postage stamp quilting

I'm finally past the thumbhole on the green ribbed handwarmers. I've got to be honest though, I'm not really feeling these now. I'm really excited about having hand warmers since I'm not overly crazy about gloves, and I absolutely love the color & feel of this yarn, so I guess it's just the design that's not doing it for me. Also, I realized while working on Coop's hat, that for the past two years I've been doing my knit stitch incorrectly, going on the back of the needle instead of the front. This has made my stitches much tighter as well as slower & harder to work. Unfortunately, to finish this project, I really need to continue to do it the incorrect way so it will still look the same. So I have a dilemma, and a few options. Do I finish this one the incorrect way, and make the second the same? Do I finish this one the incorrect way & make the second the correct way, hoping they match close enough? Do I rip this one out now & completely start over the correct way? Or do I just scratch the entire project? I can't decide, but in the meantime, I'm plugging away to at least finish this first one. I can't even think about starting on the second until I either finish & completely tear out this one, and at this point I guess I'd rather finish it & then go from there.

ribbed hand warmers

No progress on the crochet blanket, I'm kind of at a stand still on that again. I love both knit & crochet, but I go through phases where I prefer one over the other, and it's definitely knitting lately.

Completed projects: I did finish up Coop's hat, which I'm just over the moon excited about. It is a bit big on him, and I originally planned on making another that fit better, but decided against it. You'll have to excuse the picture quality, I took it on my cell phone, but if you don't laugh, you're dead inside. ;) Seriously, I absolutely crack up every time I see this picture.

coop's viking hat

The expression on his face & way he's holding his hands get me every time.

And because this kid is just so darn cute, I can't help but share this picture as well. Just look at those eyes, hide your daughters! :)

100_1307

I hope you all have a very wonderful Thanksgiving!

Make sure you head over to Freshly Pieced to see what everybody else has been up to this week.

Until next time...

Tuesday, November 22, 2011

For baby Charlie

Some friends at church just had their third child, a little boy after two girls. I figured they had most of the baby stuff they need already, but obviously wouldn't have much in the way of clothes to pass down. His name is Charlie, so I couldn't resist making him a little Charlie Brown outfit!

First of all, do you realize how hard it is to find plain colored onesies? Especially yellow ones! And finding plain black (non-dress) pants wasn't easy either. So what's a girl to do? Dye them, of course! :)

I started out with this:

before

In hindsight, I wish I had gone with darker pants to start with since I was dying them black, but oh well.

after

The yellow was brighter before I washed them, since apparently I didn't get all the black dye washed out, but I'm still happy with how it all turned out. The zig zag is a piece of white knit that I dyed black & sewed on.

And of course, every Charlie Brown needs a football! Hopefully his sisters won't play the part of Lucy & pull it out from under him. :)

100_1302

100_1303

I used some brown fuzzy stuff for the top & two layers of knit for the back. I originally picked up some football ribbon to make it a little tag blanket, but decided against it. I've got a bunch of the brown left (I picked up a half yard), so I think I'll make one for Coop too, but I'll have to pick up more of the knit (also started with a half yard) since I doubled it up, as well as used it for the stripes & stitches, and the zig zags on the shirt.

I wanted to use brown minky like this blanket from Happy Together, but couldn't find any. I did think about making the full blanket like in the tutorial, but decided I liked the idea of the mini version instead. I made mine a bit different - I decided to sew on the stripes & stitches at the end to help hold the layers together.

In the end, I'm really excited with how it all turned out, and I hope our friends like it! :)

100_1301

Until next time...

Tuesday, November 15, 2011

Keyka Lou holiday sale

Oh boy, oh boy! I shared a little secret with you this spring about Keyka Lou patterns, and I've got to tell you - my feelings haven't changed! I absolutely adore Michelle's patterns! Her instructions are fantastic, and perfect for beginners or those of you who may not be a beginner, but haven't sewn bags before.

Michelle is having an awesome sale and all her patterns are only $5 each. Five dollars!

My favorite new pattern are the Zip Pocket Pouches. Of course I had to get the pattern as soon as it came out (is it possible to be addicted to patterns?!), and I can't wait to make a few for Christmas gifts.

allthree

Inside

Another new pattern is the Strap Clutch, a few of which showed up in the recent Pretty Little Pouch Swaps & make me want to make this even more.

Eyelet Opening

inside

I'm planning to use the Pleated Pouch pattern to add a fun pocket to the outside of a clutch I'm designing for one of my Christmas gifts. I can't tell you how excited about this & can't wait until I'm able to share it with you.

All Three Together

Nested

And of course there's the adorable little Dumpling which is available for free!

Zip Pouch

What are you waiting for? Head over & stock up on some great patterns!

Until next time...

all photos courtesy of Keyka Lou

Thursday, November 10, 2011

Tutorial: Inserting Zippers

Hopefully you saw this back in August as part of Sara's Sewing Back-to-School series, but just in case you missed it I wanted to share again!

As seen on CraftGossip.com

************************************************************************

Have you ever wanted to put a zipper in the top of a bag/clutch/pouch but couldn't get everything to look all nice & pretty, especially at the seams?

zipper

Here's my (more or less) fool-proof method for adding zippers. This is not some new or ground-breaking method. In fact, there are probably other tutorials out there that use a similar method, but this is what works best for me.

First & foremost, you need to decide what you're going to make (I'm going to refer to a "pouch" to keep things simple). This method can be adapted to pretty much any pattern, or if you just want to wing it for a simple pouch. Any time I'm working on a bag pattern that requires putting in a zipper (except in the lining, for that method, this is my go-to tutorial), I skip all instructions for the zipper, do it my own way, then go back to the pattern to finish up whatever I'm making. I have yet to find a pattern where I couldn't use this method.

When you've gotten to the point where you're ready to put in a zipper (you've cut out all your pieces & applied any interfacing necessary), measure the top of your pouch, and get a zipper that is at least the same length. Zippers are sold in measurements based on the actual zip length, not the overall length (includes the amount past the zip stop). So if the pouch you are making is 12" wide at the top, you'll want to get at least a 12" zipper, which will technically be longer than your pouch. Remember, if you're using a plastic zipper, you can cut it to any length you like, so longer zippers are perfectly okay to use.

Here are the pieces I'll be using for my pouch. Each is about 13" square.

IMGP0238

The zipper I chose is a 22" zipper, so I'll be cutting it to length a little later.

IMGP0240

First we're going to make our zip ends. These are the little bits of fabric that will cover the ends of your zipper, act as a zipper stop, and keep your seam looking nice. It's the light-colored piece at the end of my zipper here:

zipper

Decide what fabric you want to use for your zip ends. You can choose something that matches your exterior, the zipper, the lining, or go crazy with a pop of color. In this case, I'm using the same muslin that I used for my lining. Unless you're making a tiny pouch with a very small opening, cut a piece of your fabric at least double the width of your zipper (I usually eyeball a piece around 5" long) & 2.5" wide.

(If you are making something with a very short zipper, you'll probably want shorter zip ends so you have the longest usable zipper as possible. I've gone as small as about 1" wide to start, but the smaller it is, the harder it is to work with, and doesn't look as nice on longer zippers.)

IMGP0246

The length doesn't matter too much, as long as you have enough to cover both ends of your zipper.

With a hot & steamy iron (I use the highest settings for whatever type of fabric I'm using), press the piece in half lengthwise with the wrong sides together. Once it cools, fold one side in to the middle crease & press again. Again, once it cools, fold the other side in to the middle & press. We're basically making double-fold bias tape here (which you could use instead of making your own).

The left side has been pressed in to the middle.
IMGP0247
Sorry, I should have used fabric that had definite "right" & "wrong" sides...

You're left with a piece that has the right side showing on both sides, is approximately 5/8" wide, and is four layers thick.

IMGP0249

Go ahead & cut this piece in half, so you have two zip ends.

Next, take your zipper, and from the end without the pull when it's closed...

IMGP0250

...cut off the tabs, as close to the metal stop as you can. Make sure you cut across as straight & even as possible.

(If you're working on a small pouch with a short zipper, you may actually want to cut off the metal stop so you don't have to worry about hitting it with your needle when you sew on the zip end.)

IMGP0251

Now sandwich the end inside the zip end you just pressed. Put the end you just cut flush with the center crease.

IMGP0252

Close it up, and pin in place.

IMGP0253

I sew as close to the edge of the zip end (along the zipper) as I can & still make sure I'm catching both sides - about 1/16".

IMGP0254

Make sure you backstitch at each end of the zipper. Your zip end is probably wider than your zipper at this point, you don't need to sew all the way to the end of the fabric, I start & stop just off the zipper, making sure to backstitch on the actual zipper.

IMGP0255

Now, measure the top of your pouch again (overall length of the pattern piece, not what you think the finished size will be). You're going to want to make a mark on your zipper just a smidge (technical term, I know...) over an inch shorter than the width of your pouch. I like to sew with a 3/8" seam, so you can adjust accordingly depending on how wide of a seam you like to sew. I've found that cutting the zipper about 1 1/8"-1 1/4" shorter than the pouch works best for me.

Remember, my pieces are 13" square, so I marked my zipper at 12", and I'll cut just short of the line.

IMGP0256

This is important!!! Do not, I repeat DO NOT, cut your zipper at the line if it looks like the picture above. Don't even think about it. I know it would be so much easier to cut it when it's closed up like that, but you'll be leaving your pull on the wrong side.

Move your zipper pull past your line (towards the zip end you already sewed on - mine is off to the right), so it looks like this:

IMGP0257

Before you cut it, sew it together below your line. It doesn't have to be pretty, you just want the two halves held together when you sew on your zip end. Trust me, it'll make things much easier in a minute. I just hand sew it with a few stitches.

(Sorry, I turned my zipper around between pictures. My finished end is now on the left.)
IMGP0258

Once you've sewn the ends together, double check that your zipper pull is in the correct part of the zipper, then go ahead & cut the zipper. If you marked your zipper an inch shorter than your opening (like I did), then cut it a little smaller. If you marked it right at 1 1/8"-1 1/4" shorter than the pouch, then go ahead & cut right on your line. Again, try to cut it as straight & even as possible.

IMGP0259

Now, just like the other end, sandwich it in the middle of your remaining piece of zip end, push up flush with the crease, pin, and sew in place.

IMGP0260

Trim your zip ends so they're even with the width of the zipper. Your zipper (including zip ends) should now be finished on both ends & approximately an inch shorter than the top of your pouch.

IMGP0261

Take the first exterior piece for your pouch, it doesn't matter which one, and lay it down rightside up. Center your zipper wrong side up along the top edge of your exterior piece. You want the "working" side of the zipper to be facing the right side of your exterior. Basically, you're placing the fabric & zipper right sides together. It doesn't matter which end the zipper pull is on, unless you have a preference (I always sew my first piece with the zip pull on the left). Make sure the zipper is centered - you can either measure on each side of the zipper (my method of choice), or fold the zipper & fabric in half then match up the center points. Open your zipper a couple inches, then pin in place so that the edge of the zipper is flush with the top edge of your fabric.

IMGP0262

(Note: You can skip this next step, basting in the zipper, if you'd like. Personally, I'm not typically a fan of basting, but I always baste my zipper to the exterior. If you want to skip the basting, you'll sandwich your zipper between your exterior and lining pieces in this order - exterior right side up, zipper right side down, and lining right side down. Like I said, I always baste (even when I made 22 zippered pouches at once!!), but it's totally up to you. If this is your first time sewing a zipper, I really can't recommend basting enough.)

Baste the zipper in place, about 1/8" from the edge (not right along the zipper teeth). Be sure to sew over the zip ends as well, but don't go past them. When it comes to sewing zippers, I always,alwayspull out my pins as I get to them. They always seem to pull the zipper out of place just a bit & can cause problems if you leave them in. So, even if you normally sew over your pins (guilty as charged!), do yourself a favor & pull them when sewing anything with a zipper.

When you get close to the zipper pull, stop with your needle in the down position.

IMGP0266

Take your foot off & completely away from the peddle. Some people will say to go ahead & shut off your machine too, but I can't since my needle moves every time I turn the machine on. Basically, just don't sew through your finger on this next part. :)

Lift your presser foot & move the zipper pull past the foot so it's out of your way to finish sewing. This can take some crazy maneuvering sometimes, and more than once I've had to remove the foot to get the zipper by. Personally, I prefer to sew as much of the zipper as possible with the zipper closed. So you may move it more towards the end, depending on which end of the zipper you're coming from.

IMGP0267

Finish basting on your zipper, making sure to backstitch at the end of the zip end.

Sorry my stitches are light & hard to see here.
IMGP0268

Once again, open your zipper a few inches.

IMGP0269

Place your first lining piece wrong side up, so the top is flush with the zipper & exterior piece. Pin in place.

IMGP0270

The double pins on the ends mark the ends of the zipper & the double pins in the middle mark the zipper pull. If you can tell where the zipper ends (you don't want to sew past the zipper), you don't need to mark those, but I recommend at the very least marking your zipper pull so you don't forget & get too close.

Switch to your zipper foot & sew along the edge of the zipper. We are sewing on the right side of the zipper, so you should attach on the left side of the zipper foot. The ledge of the zipper foot should sit on top of the zipper, and on mine, I know I can line up the right side of the little sled part (again with the technical terms...) with the edge of my fabric & have it sew nice & close to the zipper, but not too close.

IMGP0272

Start & stop at the ends of the zipper (including zip ends), but do not sew off the ends where you just have the lining & exterior together. Be sure to backstitch at each end. Stop when you get within about an inch of your zipper pull, leave your needle down, lift the presser foot, and move the zipper past the foot. Don't forget to pull your pins as you go instead of sewing over them!

When you get to the end & open it up, you should have this:

IMGP0274

Both lining & exterior are right side up & the working side of the zipper is on the exterior side.

Flip the lining all the way over so the lining & exterior are now wrong sides together. Work the seam along the zipper so it's nice & flat on both sides, then pin in place.

IMGP0275

Topstitch along the edge of the zipper. You can either use your zipper foot or switch back to your regular foot (my choice). You want to stitch about 1/8" away from the edge of the fabric.

IMGP0291
OR
IMGP0276

This will help keep your exterior, and especially your lining from getting stuck in the zipper.

IMGP0278

IMGP0277

Now, we're going to repeat the whole process with the other exterior & lining pieces.

Place your remaining exterior piece down right side up, and put your zipper (now with an exterior & lining attached) on wrong side up on top. Your two exterior pieces will be right sides together, with the right side of a lining on top.

IMGP0281

IMGP0279

Line up the zipper flush with the top edge of your exterior fabric & pin in place.

IMGP0280

Baste your zipper in place the same as before, about 1/8" away from the edge.

IMGP0282

Lay your remaining lining piece on top, wrong side up. Make sure to mark your zipper pull.

IMGP0283

Your two lining pieces should be right sides together.

IMGP0284

Once again, switch to your zipper foot, and sew, making sure to stop & move your zipper pull when you get to it, and start & stop at the end of the zipper, not the end of the fabric.

IMGP0285

If you open it all up & lay it flat, you should have both right sides of the exterior along with the working side of the zipper.

IMGP0286

IMGP0287

And if you flip the whole thing over, you should have both right sides of the lining along with the back side of the zipper.

IMGP0289

IMGP0288

Now, on the pieces you just attached to the zipper, once again work the seam so it lays flat & pin so you can topstitch along the edge of the zipper, the same as you did for the first side.

IMGP0290

At this point, you may now return to your regularly scheduled pattern, if you were following one. If not, read on to finish up your pouch.

If you want to add any kind of loop for a handle, now is the time to do it. Make your loop (I use the same method as I did for the zip ends - basically making double-fold bias tape, but much smaller. I think this piece was 1" before folding & pressing.), then pin & baste it in place.

IMGP0292

IMPORTANT!!! Right this very second, open your zipper. Do not forget or you will not stop cursing yourself later. Trust me, it's possible to open a zipper from the wrong side, but it is noteasy. Not at all. And do yourself a favor, open it all the way. Again, trust me, you'll thank yourself later.

IMGP0293

Fold the pieces back so your exteriors are right sides together & linings are right sides together, with the zipper in the middle. Pin in place.

IMGP0294

I always use double pins to mark where I need to leave my opening for turning. If I don't, I'll forget & sew all the way around.

IMGP0295

I have found the absolute, best method for turning is this one from Michelle at Keyka Lou. If you aren't using this method, do me a favor & at least try it a time or two. I promise you'll never want to do it another way, and if you do, I want to know what your better method is. You can thank me later. ;)

When you're sewing it all together, do not sew over your zip ends when you get to that point, just sew in the space next to them. You'll probably have to decrease your seam allowance to squeeze by, and sometimes I even switch to my zipper foot so I can get as close as possible to the zip ends without actually sewing them into the seam.

If you're making a basic flat pouch, just sew all the way around, turn through your opening, sew the opening closed, and carefully push the seams into place at the ends of your zipper. Remember, your seam allowance here is probably smaller than everywhere else, so be gentle, but you can get them pushed out nicely.

If you want to make a pouch with a flat bottom, sew around only your exterior, start & stopping about an inch on the lining side of the zipper. If you make your gussets in your exterior beforesewing the lining, you've got the entire zipper to reach through, which is much easier than trying to reach through the opening you leave in the lining. Once your exterior gussets are made, sew around the lining piece, then use your turning opening to make your gussets.

When you're all done, you should have a nice little pouch with a pretty zipper! It still takes some practice, but after you do it a few times, you'll have the process down so you barely have to think about it.

zipper

zipper

zipper

Good luck! If you have any questions, let me know & I'll try to clear anything up that might not quite make sense.

Until next time...