Monday, January 31, 2011

Time to share YOUR Cosmo Bags

I finally got mine completed, have you? If you have, link up to your blog post or Flickr picture here. Each link is your entry to win this month's prize from Sew Sweetness.

Geisha Fans from Amy Bulter
AB_16_Clay_GeishaFans_Pal_01

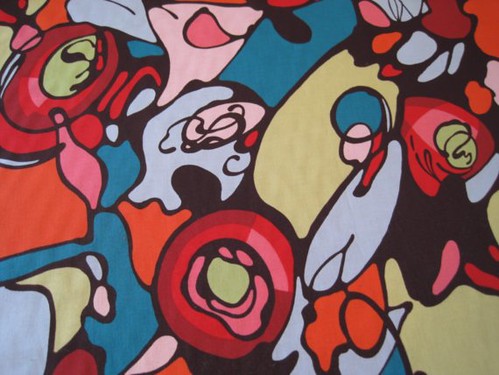
Abstract No. 9 from Alexander Henry
ah no. 9
The link party will be open through midnight Friday, February 4 & the winner will be announced next Monday, February 7.

Let's see those Cosmo Bags!


Only links entered above will be considered for the giveaway drawing, not links entered as comments. You may enter more than once ONLY if you completed more than one bag, and each bag must be in its own blog post & its own link above. If you blogged multiple times for the same bag, please do not enter multiple links above, but link to them in your own blog post. We do want to see your process!

Until next time...

Cosmo Bag: Completed!

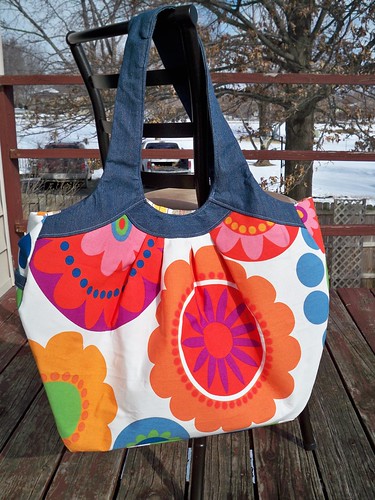
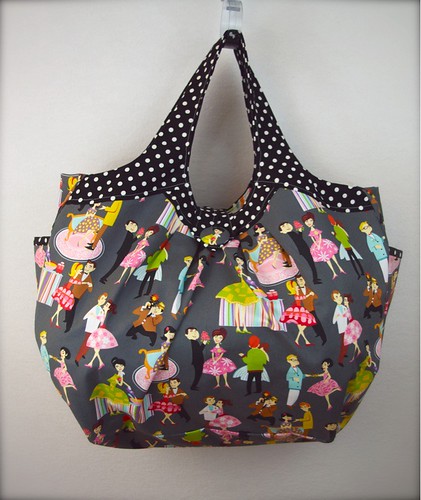
Cosmo Bag Exterior

Ahhhh...satisfaction! I was so glad to get this bad boy finished up this weekend, and just about as excited to actually have some sunshine to take a few decent pictures! :)

Let me tell you, this pattern was certainly a test of my patience, and from the comments I'm seeing from those of you who have already completed the bag, I'm sure you'll agree! I'm just hoping the rest of the "easy" patterns in the book are less complicated than this, and I'm now just a little concerned about the later "intermediate," "advanced," and even more so the "experienced" patterns!

I do know from looking through the Flickr album, everybody seems to have successfully conquered the pattern, and there are a ton of really beautiful bags. I love how even with the exact same pattern, we've all created so many different looks, just with our fabric choices.

So, my overall thoughts:

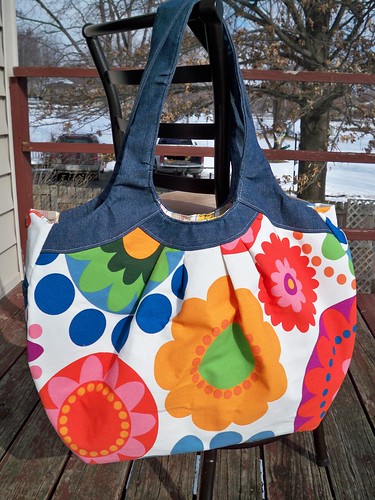
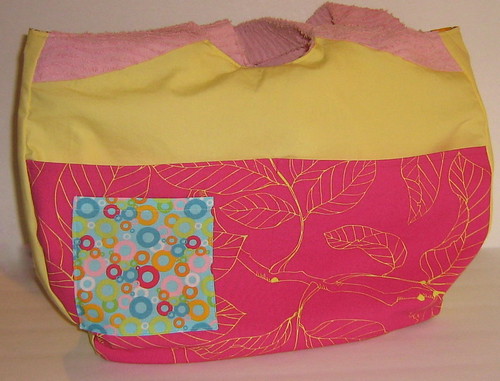
First of all, I mentioned clear back in the beginning that this bag would be perfect for large prints, and I'm glad so many did choose the big prints. Here's the other side of my bag, I purposely chose not to have my two sides match exactly.

Cosmo Bag Exterior

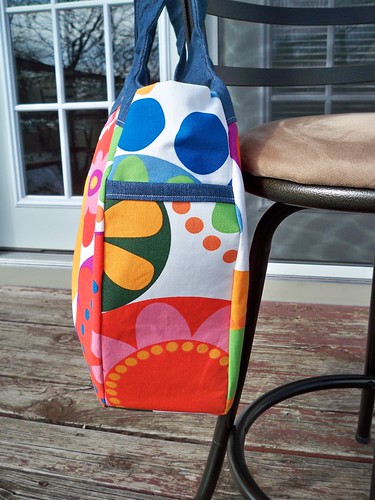
Some people mentioned that the side pockets might be a bit pointless since they're so tall & skinny. I can certainly see where they're not going to be for everybody. I happen to have a tall, skinny water bottle that fits perfectly, so it works for me. Some people modified it by just making the overall pocket shorter, and I saw someone else (sorry, I can't find the picture now!) who just stitched across the pocket half way down. I also like this version with two pockets on the side. I think a shorter pocket would definitely be nice for keeping keys & a cell phone a little more handy.

You can't see it in the pictures, but I chose not to make the handles out of two separate pieces. Instead, I cut the handle pattern with the top of the strap on the fold, and only had to cut out four pieces. I wasn't fond of the idea of having a seam in my handle (and therefore a weak spot) and honestly didn't really see a reason for it. My handles worked out fine, I had one less seam to try to topstitch over, and I love the look of the one-piece handles.

The pattern didn't call for any top stitching on the contrasting band of the side pocket (which came up in the Flickr discussion), but I went ahead & added it. It helped hold the two layers of the pocket together at the top, and I thought it would look nice to match the top stitching on the bands & handles.

Cosmo Bag Side

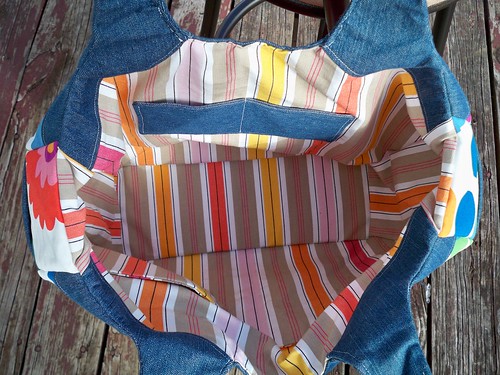
The interior pockets are huge, and I wanted some smaller pockets to keep track of smaller stuff. I had mentioned before that I was planning to do all the large pockets as called for in the pattern & add a couple small ones, but instead I opted for the large pockets on one side only, and added a smaller patch pocket on the other side.

Cosmo Bag Interior

I did add two pieces of craft foam board into the bottom of the bag to help give it extra strength. I just cut two pieces slightly smaller than the bottom panel (they ended up being 5" x 14") & put them in before I stitched up the inside of the handles. Then, to keep it in place, I stitched the lining to the bag along the seams (unfortunately, after the above picture was taken). I did this for the first time with the WOZ bag, and really like how much better everything stayed in place after the lining was stitched in. No more shifting lining, and on such a big bag, it helps a ton. It's not overly hard to do, just a bit time-consuming.

You'll probably notice I didn't add the button & loop closure. Honestly, it's partly because I just didn't feel like it. I had decided early on that I didn't want to add it (even though I think it's a cute feature), and considered adding a magnetic snap instead. Then, in the end, I decided it wasn't flopping open too much, and if it were stuffed full, I probably wouldn't be trying to secure it close anyways since it'll most likely be used as an overnight or beach bag.

Overall, I'm really happy with how the bag turned out, despite some of the frustrations in the construction. I'm not sure it'll go on my to-do list to make again anytime soon, but that's more because I don't really have a need for such large bags. I do think it's a decent pattern to have in my collection though, in case someone should request a large bag.

I'm excited to start working on the Reversible Everyday Shopper for February, it looks like it will be much easier!

Until next time...

Friday, January 28, 2011

A couple reminders

First of all, don't forget this is your last weekend to finish up your Cosmo Bag! I know I've got a couple of details to finish up on mine, and I can't wait to share it with you all on Monday. I've loved seeing all your bags in the Flickr group. There are some amazing bags there, make sure you check it out!

Next week you'll have the opportunity to share your bags & enter to win this great fabric from Sara at Sew Sweetness.

Geisha Fans from Amy Bulter
AB_16_Clay_GeishaFans_Pal_01

Abstract No. 9 from Alexander Henry
ah no. 9

Also, make sure you head over to Sew Sweetness if you're interested in getting in on the Echino fabric co-op. Sara's running a great opportunity to get fabric that's usually $16+ for only $8.50 a yard (plus shipping)! Hard deal to pass up for some great fabrics. The spreadsheet closes today (January 28), so if you're interested & have been on the fence about it, head over there right now and get your order in! Don't miss out on this great opportunity! Right now there aren't enough people signed up to be able to order, so help us out if you're interested! :)

Until next time...

Thursday, January 20, 2011

Cosmo Bag: Inspiration

I was nosing around Flickr a bit the other day & found some great completed Cosmo Bags.

I really love this one from Sewbeeit, what a great idea to add the extra smaller pocket!

Inside of Cosmo Bag

I was trying to figure out when I was cutting fabric if I wanted to go ahead & add both of the big pockets. I do like the idea of having them, since the bag is so big, but I was also worried about losing smaller items. I thought about using the large pocket from the pattern for one side and just doing a couple smaller pockets on the other side, but I like this idea of using both. My only concern would be if there was anything heavy in the small pocket (cell phone), it might kind of pull down the side of the big pocket. So now I'm thinking I might go ahead & put the big pockets on both sides, but put a small pocket inside the big pocket, but attached to the interior panel of the bag. Make sense? Clear as mud! :)

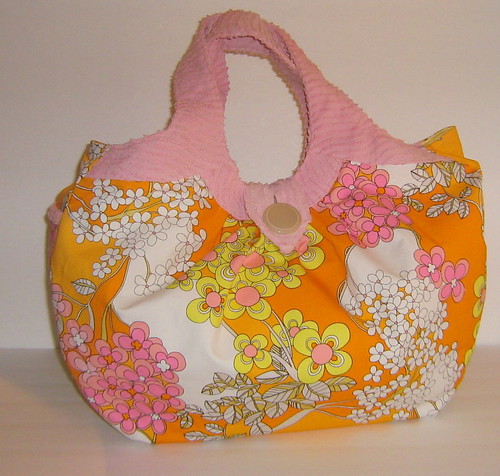
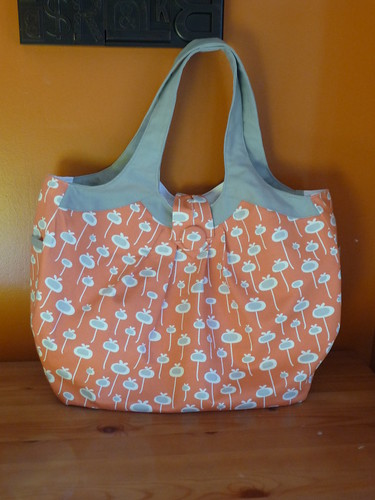
The outside of her bag is great too, love this orange print!

Cosmo Bag

I absolutely love the colors on this one from EmilySue. What a perfect way to bring spring to a dreary January (at least around here)!

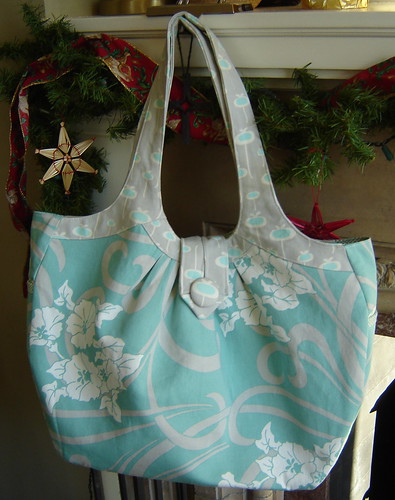
Teal & Gray Cosmo Bag

Super fun fabric from Modernjax!

Cosmo Bag

More great colors from SleepytimeSewing. Of course, I'm partial to anything orange. :)

Amy Butler Cosmo Bag

So how's everybody doing on their progress? I'll admit, I'm running a little behind & am finally finishing up getting all my pieces cut out, but I'm planning on some marathon sewing this weekend & hopefully I can get it done!

Don't forget you can head over to the Flickr group to share pictures & discuss.

Until next time...

Style Stitches Flickr Group

I just realized I don't think I ever shared the Flickr group I set up for the Amy Butler Style Stitches Sew Along! Head on over to share fabrics you're using, your finished projects, and ask any questions you might have!

Monday, January 17, 2011

Postage Stamp Quilt Along

Now that the cat is out of the bag (and yes, we're having a baby, not getting a puppy!), I can share another project I'm working on.

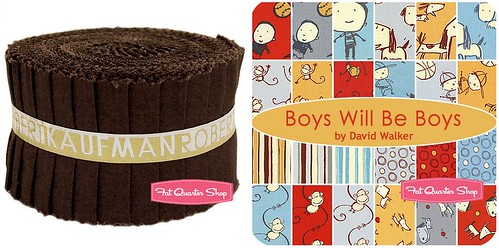
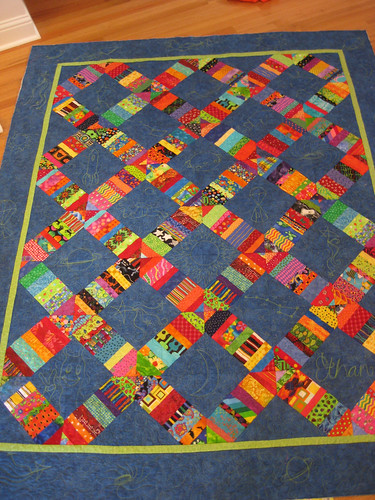
P.S. I Quilt is hosting a Postage Stamp Quilt Along that I saw a few other people talk about & thought it would be fun to join. When I saw Sara at Sew Sweetness was doing it as well, she somehow managed to talk me into joining (girl is persuasive!). I originally planned on making something gender neutral, since we don't know the sex of the baby yet & may not find out at all. But then I found this great Boys Will Be Boys fabric, and I just couldn't pass it up.

postage stamp quilt

So I've decided I'll go ahead & make a boy quilt, and if down the line we find out it's a girl, I can either keep this one for later or give it away.

The brown Kona shown is what I'm using as my solid between the print fabrics. If you're following along over at P.S. I Quilt, we're supposed to have our strips sewn together & will be getting the next step of instructions today. Unfortunately, I didn't get quite that far last week, and only managed to get my strips put together in sets. I'd love to work on getting them sewn together in the evenings this week, but like I mentioned earlier, I'm not doing much in the evenings these days. Hopefully only a couple more weeks or so of that & I'll start getting my energy back!

Until next time...

Let sleeping dogs lie.

(Umm...does that feel like bad grammar to anybody else?)

Normally, Raven prefers to lay with her head on something. Anything, really - pillows, blankets, her toys, feet, sometimes she's happy just to have her head on a different surface than her body. She'll lay down on the carpet, but put her head on the wood floor. She's kinda odd like that. :)

So this is how she often sleeps:


She likes to prop her head on the edge of her bed, but sometimes she'll put it on her toy (if she has one in her bed, and I'll admit - I'm the one who put Eeyore in her bed), and sometimes she likes to rest her chin on the Rubbermaid tub that sticks out from under the bed.

The other night, however, she did this:


She got into her bed, and immediately buried her head under Eeyore. I couldn't believe my eyes. I just had to laugh & point it out to Nick, who cracked up as well. It's like she was trying to keep the light out of her eyes so she could go to sleep.

Until next time...

String Me Along - January

I feel like I have so much to share this week since I was finally able to get some sewing done! Since finishing up the WOZ bag just before Christmas, I haven't touched the sewing machine, mostly because I just haven't had the time. Between getting ready for Christmas, and actually having our three Christmases, I've had no weekend time & forget about getting anything done in the evenings lately! All I can do is cook, eat, and sleep!

So, more to share later this week, but for now, my first block in the String Me Along Quilting Bee.

This block is for Linda, who is making a quilt for her daughter similar to this one she made for her son.

IMG_1699

I really like the finished quilt, and this block was super easy to make. I got it all put together Saturday morning before lunch, and since it makes such a big finished block (18 inches!) it wouldn't take long to have a completed top.


You can tell my blocks on the right don't quite match up with the blocks on the left. I'm not exactly sure what happened, but I think I may have trimmed one of the blocks incorrectly. In order to have the pink triangles line up correctly, I had to sew them this way & I hope Linda is able to make it work. It would have been much easier to trim with a correctly sized square, but I didn't have one, so I made due with my cutting mat & see-through ruler. The rest of them turned out perfectly, but one was just a smidge smaller than the others & threw things off a bit. I did my best to make it work, and I just hope Linda is able to use the finished block.

This fabric was my absolute favorite of all the ones I received (although they were all pretty!), so I tried to make sure it wasn't stuck on an end where it would get cut off.


Is it just me or does it remind anybody else of the fire power flower in Mario Bros.? Probably just me. :)

I'm looking forward to finding out what we'll be making for February!

Until next time...

Thursday, January 13, 2011

More Projects

The first list was getting a bit long, so I decided to start another. :)

Ribbed Hand Warmers from The Purl Bee (progress and more progress!)
Gift Bow from Magazine Pages from How About Orange
Zippered Laptop Sleeve from Crap I've Made (hello, awesome blog name!)
Gift Card Cozy from Make It & Love It (I think these would be great to make up & have on hand. Plus they make cute credit/store card holders as well!)
Folding Grocery Tote from Yarn Geek
Quick Carrier from Earthgirl Fabrics
Friday Night Bag from Sew a Straight Line
Plaid Block from Block Party
Crochet Cowboy Boots from Hyphenated & Overextended
Divine Hat from Rheatheylia
Zippy Wallet from Noodlehead
Stack & Nest Quilted Blocks from Oh Fransson! (via Sew, Mama, Sew)
I-Spy pillows from Noodlehead (not a tutorial, just an idea I don't want to forget!)
End of Summer Wristlet from Flamingo Toes
Maternity Band from Make It & Love It

Until next time...

TWT - "I do not think it means what you think it means"

Or maybe it means exactly what you think it means. :)


Until next time...

(Bonus points if you can name the movie where I got today's title!)

Monday, January 10, 2011

Why I Love Amazon

This is a bit random, but I thought I'd share anyways. And also, I'm a fan of being honest with you guys. :)

Because of some personal stuff going on at home (more on that later this week), I was a bit of a slacker & didn't get a copy of Style Stitches ordered in time to have it delivered to me, then ship it out to last week's winner. After a certain point, I decided it would be best to just have it delivered directly to the winner from Amazon (side note - I almost ordered some random, roughly six dollar item just to get free shipping. How much of a fun surprise would that have been?!). I did consider paying for two-day shipping since we're already almost half way through the month, and I wanted her to have as much time as possible to complete the bag for this month. I thought about it though, and decided that Amazon is usually really good with shipping, so I'd take a chance on the 3-5 day shipping (also, I'm kind of cheap - again with the honesty!). So Friday morning, right after I announced & heard from the winner, I ordered the book. Today I got the e-mail that it had shipped (Friday, it turns out!) and was delivered this afternoon. So I paid for 3-5 day shipping (that's business days, mind you) and basically got one-day shipping. I love Amazon. :)

Until next time...

Echino Fabric Co-op

Sara, over at Sew Sweetness, is hosting an Echino Fabric Co-op. This is a fantastic way to get a great deal on some really fun fabric. I can't go too crazy right now, but I'm definitely going to stock up a bit. Take a look through Style Stitches & be thinking about what fabrics you might want to use for the future projects. One thing to keep in mind though - because the fabric is coming from overseas, shipping time will be at least 8 weeks, so plan accordingly. It's too bad too, I would love to use this cheater fabric for the Cosmo Bag!


I think I'll pick it up anyways, in a couple of the colorways.

I'm also thinking about getting these cameras in a couple colorways. No definite plans for it yet, but I've always liked it when I've seen it around.


I'm torn on these bicycles, but they're kind of growing on me. I'm considering it in a couple colorways as well.


I wish I could get my hands on some of the scooter fabric, I'm not sure why but it's always appealed to me.


And lastly, and unfortunately not available through the fabric co-op, I ordered a yard of this today.


I've been going back & forth about it for a while now, but I'm pretty sure I would kick myself if I didn't pick up a yard. Love, love, love these View Finders from Melody Miller's Ruby Star Rising collection. Yes, it's expensive, but like some Heather Ross stuff I like (hello goldfish & garden gnomes!), sometimes you just gotta splurge. And besides, I've got Christmas money burning a hole in my pockets. :)

So, go check out Sew Sweetness for more info on the Echino Fabric Co-op, and get signed up!

Until next time...

Friday, January 7, 2011

And the winner is...

Is the suspense killing you too? :)

First, let's talk about the bag we're going to be making this month. If you've got your copy of the book already, make sure you read through all the instructions, then cut out your pattern pieces, pick your fabric, and get your fabric cut out. Sometimes I swear picking the fabric can be the hardest part!

One nice thing about this bag, as I mentioned before, it's so big that it's perfect for a nice big print. I often find prints I really like that don't work well for smaller projects, so drag out your favorite big print for this one! Also, smaller prints can sometimes seem overwhelming (but not always!) on such a big bag. I've also thought about doing some sort of patchwork for this bag, but after the WOZ bag, I'll be steering clear of that sort of thing for a while!

Sara, from Sew Sweetness, is working ahead a bit & has already completed her Cosmo Bag. I love it! Make sure you check out her review of the pattern (as well as her other pattern reviews - it's all her fault I tackled the Mabel bag!) if you're concerned about starting out with such a big bag. And this really is a big bag, but there's always a place & time when something like this is exactly what we all need. Sara also has some great tricks & tips for making the bag.

(Photo courtesy of Sara, Sew Sweetness)

Speaking of Sara, she's our wonderful sponsor for this month! Sara will be giving away one yard each of Amy Butler's Geisha Fans & Alexander Henry's Abstract No. 9 (both pre-washed).


There will be a separate drawing at the end of the month for the fabric giveaway. I'll have a linky party for all who complete the bag for an entry to win.

Remember, if along the way you have any questions at all about the patterns we are working on, feel free to e-mail me. I may not be able to answer your question, but there are quite a few people participating, so someone is bound to be able to help. I will do a Q&A post so we can all learn together.

So over the weekend & through next week, work on getting your pieces cut out for the bag so we can get sewing. I can't wait to see what everybody chooses for their fabrics for this bag!

Hmmm....it feels like I'm forgetting something... Oh yes, the entire reason for this post! (Aren't I a stinker?) The moment you've all been waiting for (and probably scrolled straight through all that mumbo-jumbo up there)...

The winner of their very own copy of Amy Butler's Style Stitches...sorry, the rest of you will have to buy your own copy since I can't get one for you all (but I wish I could!)...


And who is number 6? None other than Sourkraut from Langes Fädchen, Faules Mädchen (also known as, "that blog I always have to copy & paste because I can't figure out how to type those characters"). Please send me an e-mail so I can get it shipped out to you right away!

Until next time...

Thursday, January 6, 2011

Just a quick reminder!

Don't forget to enter the giveaway for your chance to win a copy of Amy Butler's Style Stitches!

Also, if you do already have the book, make sure you're reading through the pattern & getting your fabric picked out. Since the first bag is such a big one, big prints are a great idea! I know there are a lot I love, but will never work on smaller bags & wallets. Now's the perfect chance to use them. Personally, I think I'll be using this nice home-decor weight I picked up at Ikea forever ago. I'm pretty sure I should have enough of it for the body of the bag!

Tomorrow I'll be announcing the winner as well as going over a few extra details for this month's bag - the Cosmo Bag!

Until next time...

Tuesday, January 4, 2011

I suppose I should add...

I just realized I never mentioned when the entries close for the Amy Butler Style Stitches book giveaway & when I'll do the drawing! Entries are open through Thursday, January 6 & I will announce the winner on Friday. So make sure you go enter if you haven't yet!

Until next time...

Monday, January 3, 2011

ABSS Sew Along - let's get this party started!

(Sorry, the giveaway is now closed)


Is everybody ready to kick off 2011 & get the Amy Butler Style Stitches Sew Along started?! I know I am, so let's kick things off in a big way. As I mentioned before, I'm giving away one copy of the book, and here's your chance to win! Entering is easy - everybody will have two chances to be entered. First, leave a comment with the project from the book you're most looking forward to making. Second, share about the Sew Along on your blog, and come back & leave a comment with a link to your post. Easy-peasy!

I'll share more about the first project (The Cosmo Bag) later this week.

Entries will be open until midnight Thursday, January 6, and I will draw & announce the winner Friday!

Until next time...

Wizard of Oz Mabel Bag

Here's the one big project I worked on for Christmas, and have been anxiously waiting to share, especially for Amy's Sew & Tell now that it's back from "Christmas break." I've also been kind of slacking since I actually gave this away on Christmas, and haven't gotten around to sharing it with you all before now.

This pattern is the Mabel bag from Jenna Lou Designs. I love this pattern! It's a great size for a messenger bag, and could easily be used as a laptop bag with some padding or a padded laptop sleeve. It uses Peltex interfacing, so it's nice & sturdy.


I did a disappearing nine patch for the main outer fabric made from 12 different Wizard of Oz fabrics I found at a local quilt shop.


My favorite of the prints is this "Surrender Dorothy." Also, it's difficult to see, but I did the "quilting" (not exactly, since there's no batting) with metallic red stitching.


The pattern calls for a zipper pocket on the inside, but because I only had just enough fabric left and hadn't ever tackled it before, I decided to play it safe with a simple slip pocket. I did add a strap with a clip for keys, or this little pouch.


The pouch is made from the Keyka Lou keychain clutch pattern, but I increased the pattern size 115%. It's now big enough to hold an ipod touch (or iphone). The original pattern size is nice & small, but wouldn't hold anything but a small phone or some change.


The strap is adjustable with metal hardware, and is made from alternating size pieces of the yellow bring road & ruby red slipper fabrics.

Overall, I couldn't be happier with how this turned out. It was relatively simple to make, and if I hadn't decided to do the patchwork, it could have easily been made in a weekend instead of over about a month's time. One thing that was difficult though was the Peltex lining made it a bit clunky to maneuver, especially around the curve in the top. Also, because it's so thick, I had to hand-sew the strap reinforcement & wasn't able to topstitch around the opening, which I usually prefer. It doesn't look terrible without the top stitching, but it's a finishing touch I always like to add.

Until next time...


Sumo Sweet Stuff Pink Hippo Party